In Ensemble Stars! Basic, players can access Ensemble Stars! mode can be accessed by clicking the blue button that reads あんさんぶるスターズ!へ (containing a "!" with an arrow around it). Not all features of Ensemble Stars! were carried over to this archival mode, and this guide covers only the features still accessible in Ensemble Stars! mode.
You can only use Ensemble Stars! cards in this mode; you cannot use Ensemble Stars!! Basic cards. Additionally, all Ensemble Stars! cards will automatically be placed in your album upon downloading Basic. You must first take your Ensemble Stars! cards out of your Basic album first. You need at least 6 cards so you can create a team for lessons.
You cannot play this mode if you did not start your account before the game was updated to Basic.
1st press Display: Number of Copies, % of Idol Road Complete, [if] Bloomed (済 if yes, 未 if no).
2nd press Display: Shows Lesson Skill.
3rd press Display: Shows Live Skill.
4th press Display: Details which unit(s) the card is in. (Ex. Produce unit, Live unit)
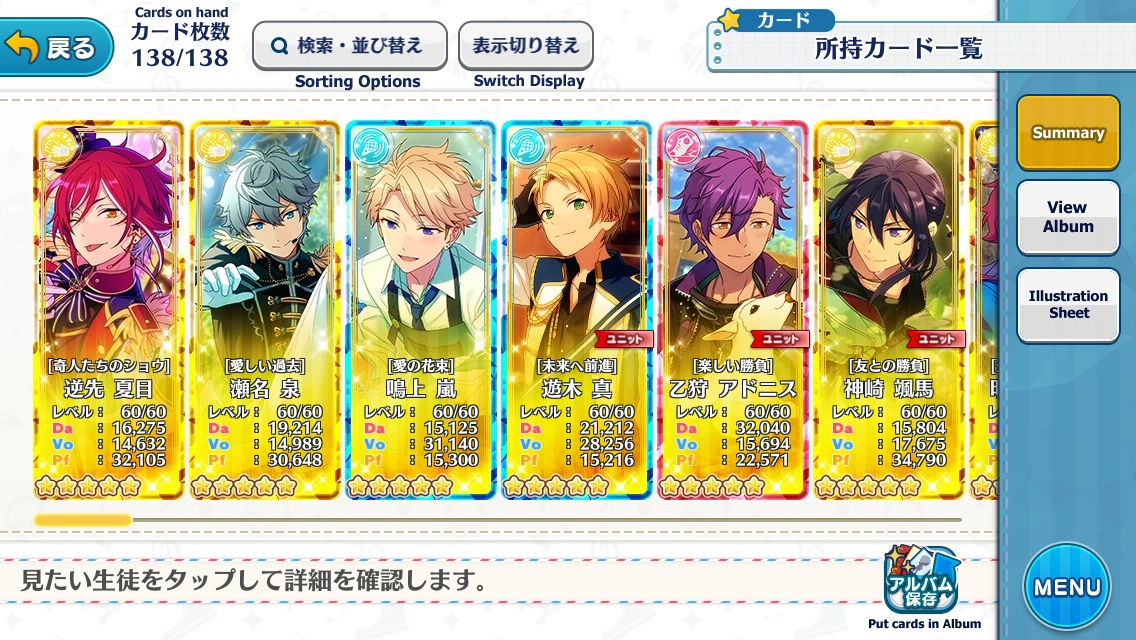
Summary: Default mode of page. In this mode you can click on cards to access their #Card Details for a summary of their stats.
You cannot hold down on a card to access their details. You can only do that when you look at the cards when you are switching them in the Produce Unit menu.
First dropdown: Oldest First (古い順), Newest First (新しい順), Lowest Rarity First (レア度が低い順), Highest Rarity First (レア度が高い順), Character Order (キャラクターごと).
Next 3 button selects:
Rarity: All, 1★, 2★, 3★, 4★, 5★
Attribute: All, Dance, Vocal, Performance
Method of Obtaining: Event, Scout, Other (その他)
Second dropdown: Select a specific unit's cards to view. All, or click on the unit's name.
Character Choosing: Tap one of the blue + symbols to add a character. You can add up to three at once. If you want to remove a character, tap the square with them and then tap on the empty gray square to the left of Tetora.
Illustration Sheet: Create a graphic featuring cards that you own. Tap the graphic near the bottom center featuring cards and stars to select your frame and cards. You can display any card with red, yellow, and blue frames, but if you select the rainbow-colored frame, you will only be able to display cards you have Rainbow Bloomed. You may also choose how many cards you want shown, any amount within the 2-5 range. Using the magnifying class on the top right corner of a card, you can zoom in on the card's illustration, and you can move where on the card you're viewing by sliding your fingers in any direction. Tapping the blue checkmark button will show you your final product, which you can screenshot and share. Tapping on it twice will show you a version of it with your display name.
Red "ユ二ット" ribbon: Shows that the card is currently in a unit(s).
Sorting Options
Rarity (レア度): Choose whether you want to view all rarities (すべて = all) or a specific one.
Attribute (属性): Choose whether you want to view all attributes or just Dance, Vocal, or Performance cards.
More specific options below. These can be sorted by descending (降順, on the left) or ascending (昇順, on the right) order.
Sorting Options
レア度
Rarity
入手日時
Time Obtained
レベル
Level
Da.値
Dance Stat
Vo.値
Vocal Stat
Pf.値
Performance Stat
総合値が高い順
Overall Stats
限界突破回数順
Amount of Copies
ロードの開放率順
% of Idol Road completed
キャラク夕ーごと
According to Character
レッスンスキル順
According to Lesson Skill
ドリフエススキル順
According to DreamFes Skill
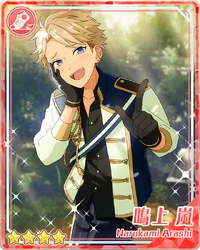
Card Details
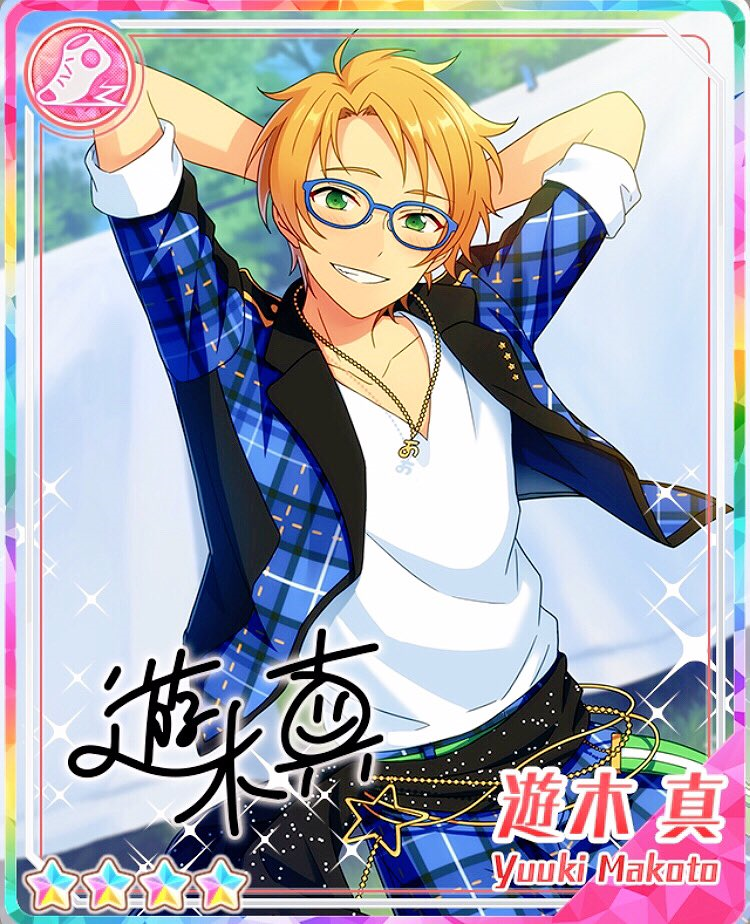
There are three main attributes each of the cards can have; Dance (Red), Vocal (Blue), and Performance (Yellow). All cards have stats of these three regardless of their main attribute.
Card: Card Title (special for each card).
Level Up: Level up the card using your PP (Producer Points).
Intimacy Points: Fill up the points through #Intimate Events to increase your Intimacy Levels with the character. Intimacy Points can also be gained through main screen Greeting Events, but these are independent of card limits.
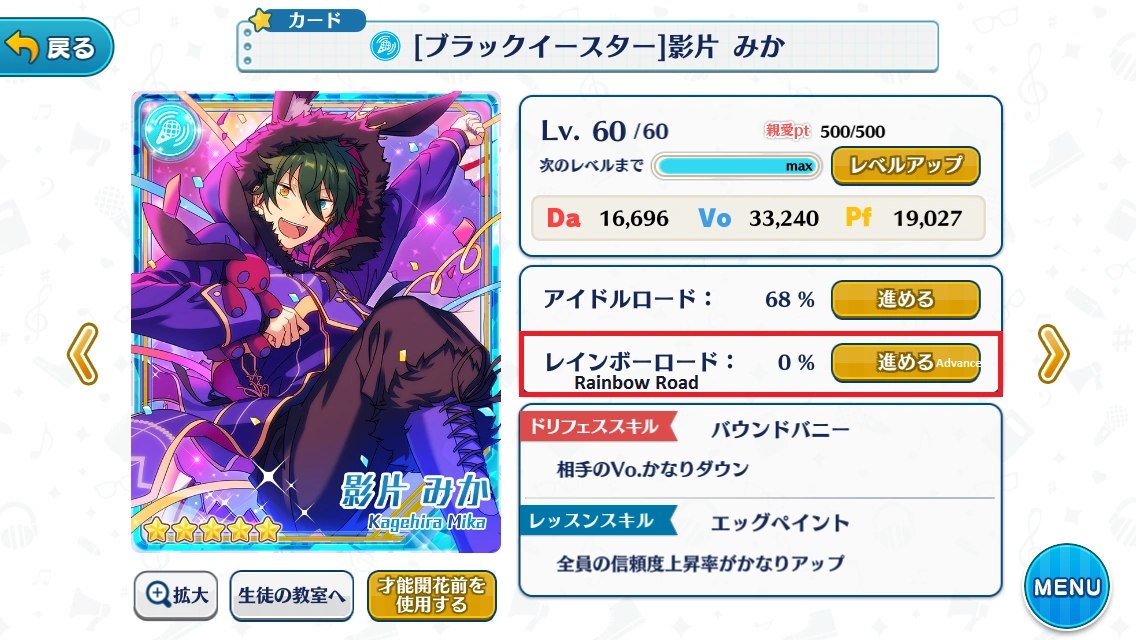
Idol Road
Advance: Press to see the card's Idol Road in order to unlock nodes to strengthen the stats of a card.
Rainbow Road: A different Idol Road that can Rainbow Bloom cards, causing them to become colorful and a little stronger. See Star Medal Shop for more details.
Live Skill: Active skill (only activated in Lives). Upgrade in the Idol Road to strengthen the skill and for a chance of the skill activating during Lives.
If a skill activates during an Event Live it can give bonus stat points.
Lesson Skill: Passive skill (always active). Upgrade them in the Idol Road to strengthen them.
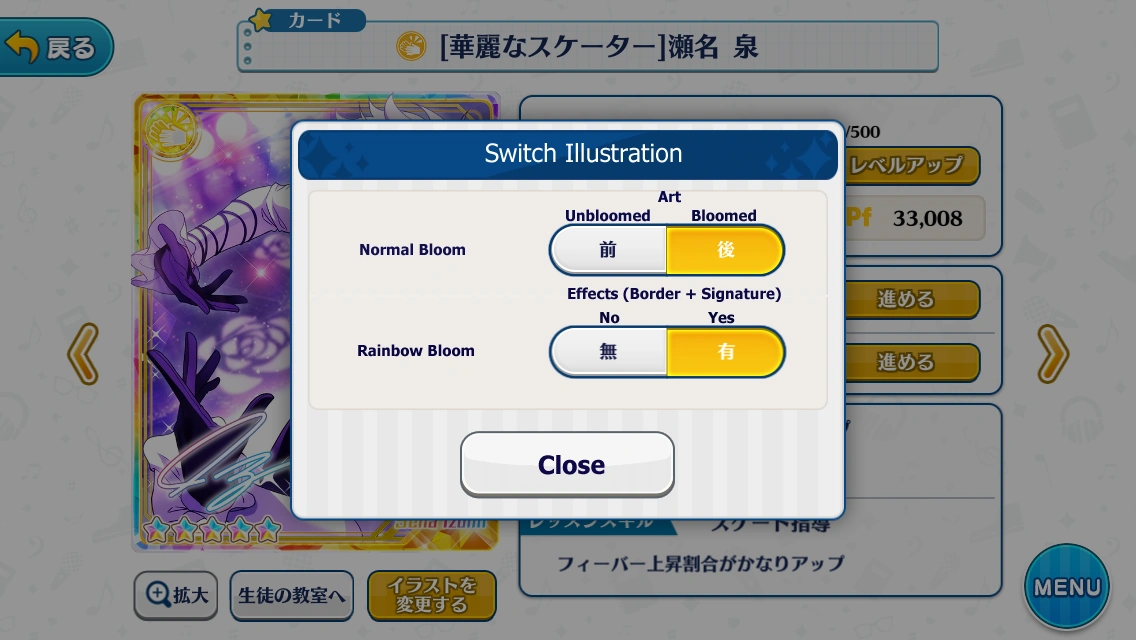
Enlarge Card: Leads to a screen where the card can be viewed larger. Also displays the card's chibi. You can switch between bloomed and unbloomed images via the flower button.
Switch Illustration: Switch between Bloomed/Unbloomed art, and between Rainbow and Original appearance when a card has been Rainbow Bloomed.
Switch Illustration
When tapping on the option you want, the window will not close automatically, but you will be able to see the result.
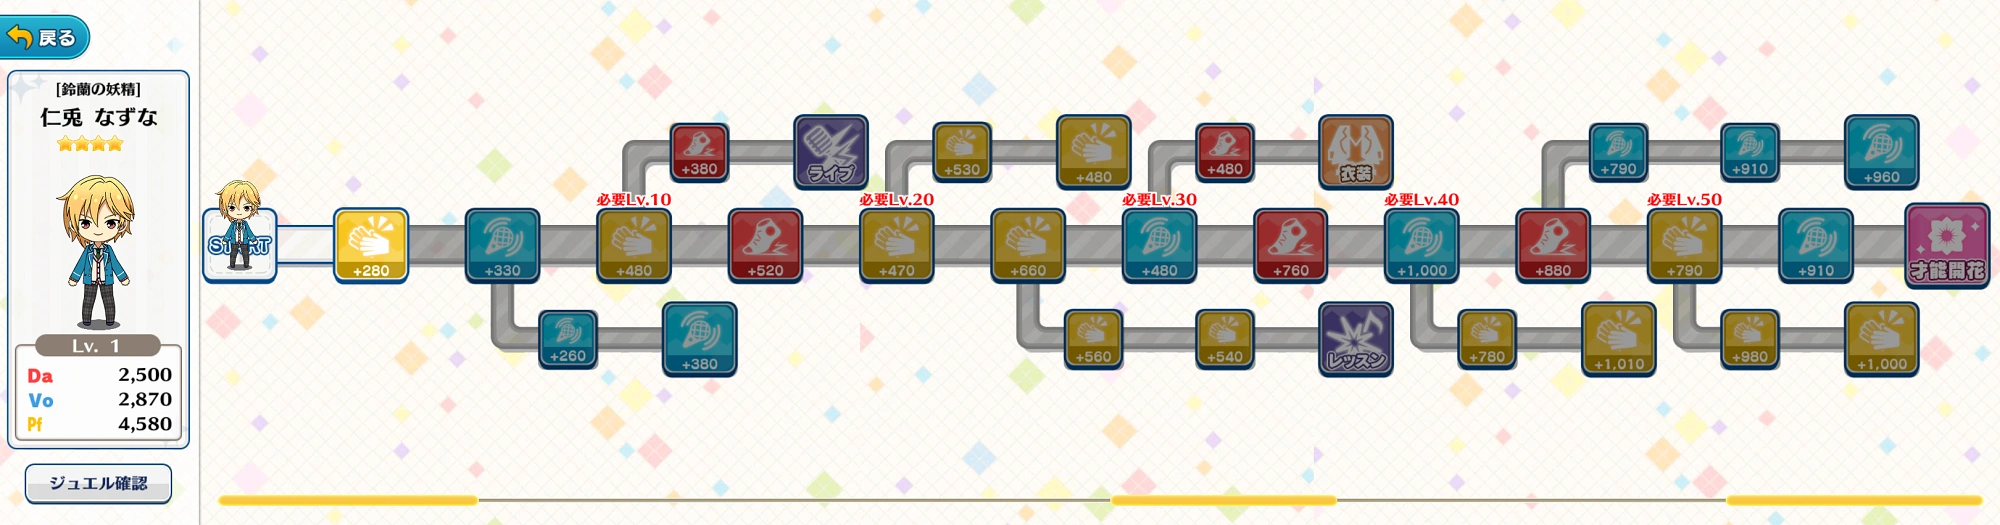
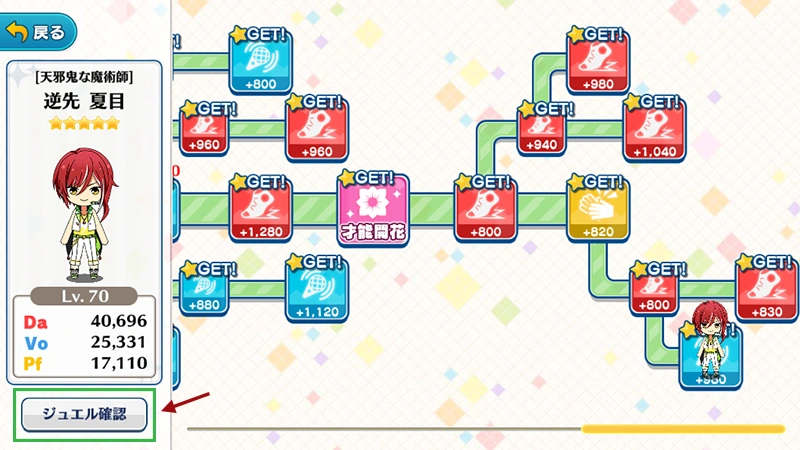
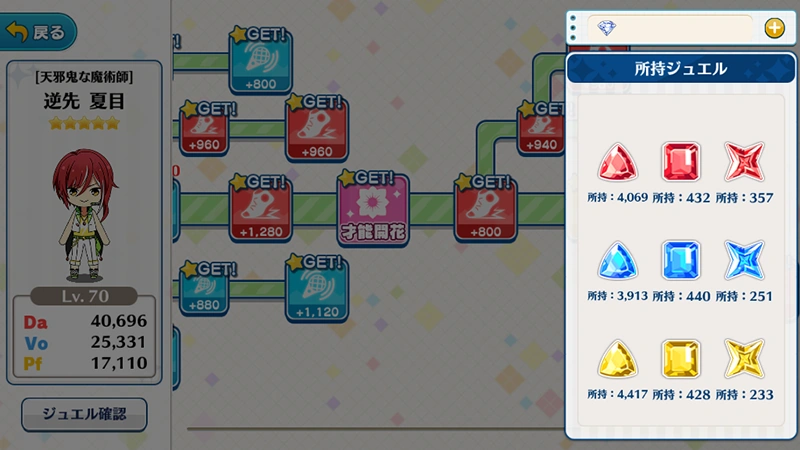
Idol Road
Cards have a function known as the "Idol Road" which involves allowing the player to Increase the Stats of the card through the use of #Jewels gained from Lessons.
In certain cards, Voice Clips, Backgrounds, Outfits, and Stories may be unlocked in the Idol Roads.
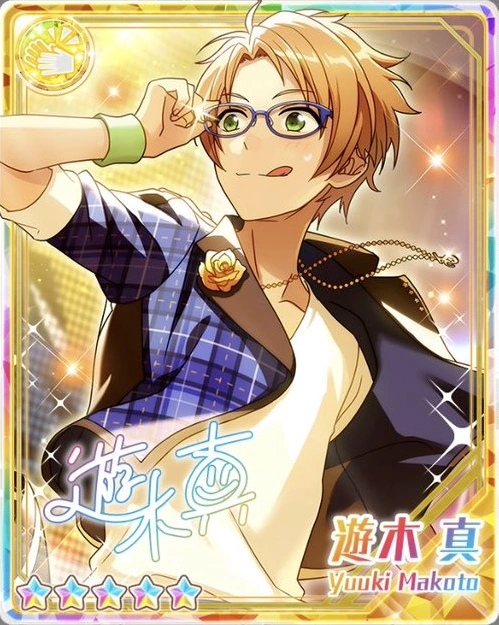
At the end of the Idol Road, cards can be "Bloomed" in which the card will receive new art and gain an overall stat increase.
Idol Road Example
Notable Idol Road Nodes
Background
Outfit
Story
Voice Clip
Bloomed
Live Skill
Lesson Skill
Rainbow Road
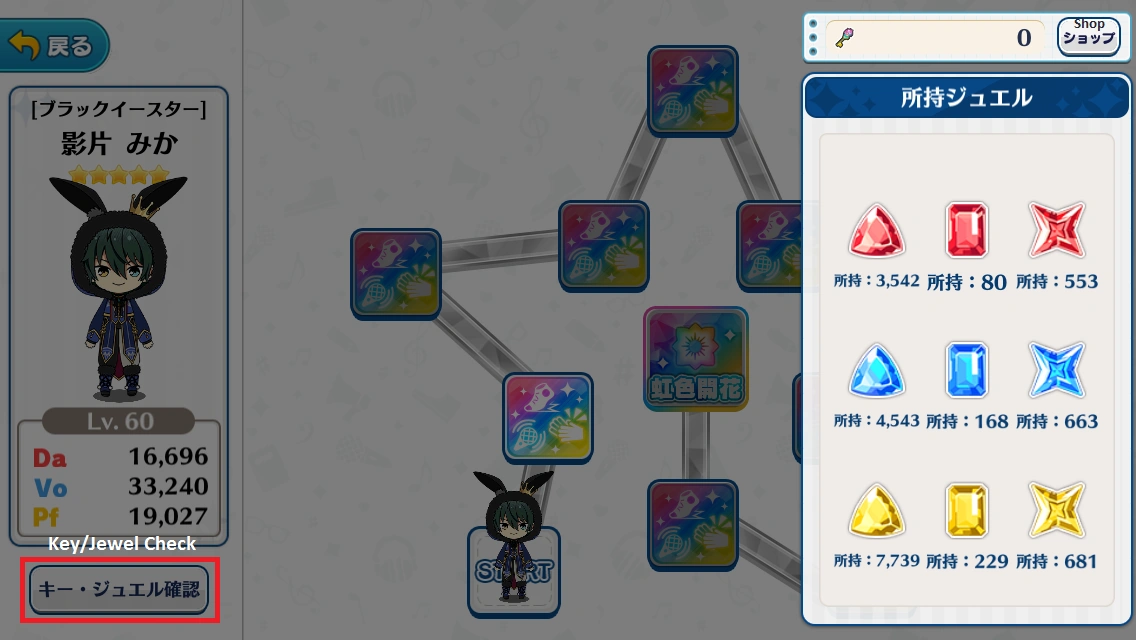
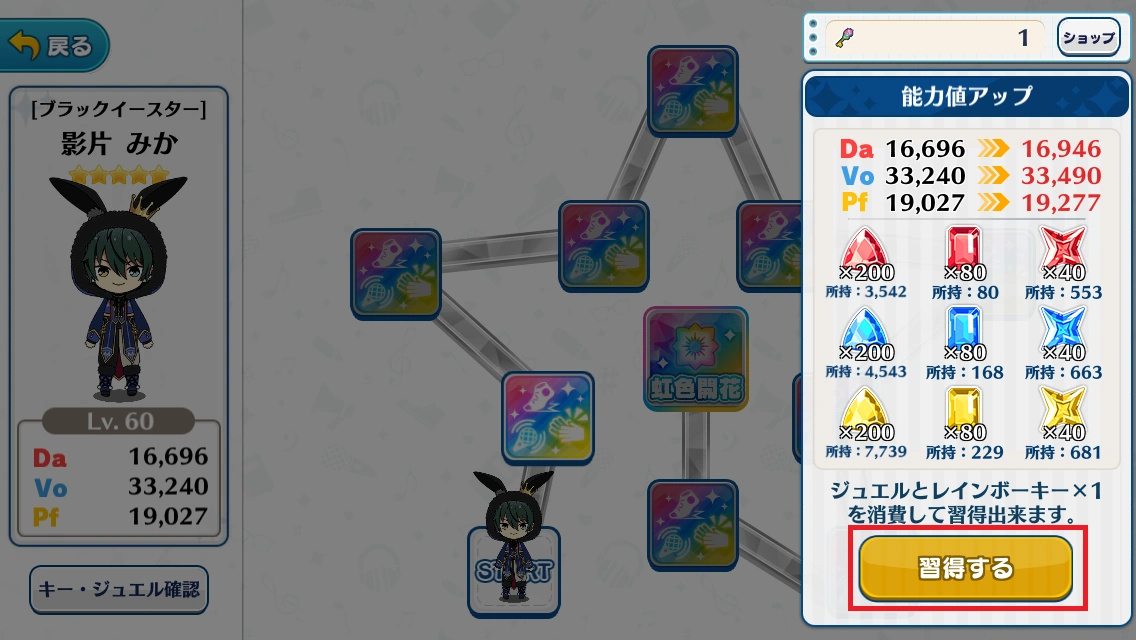
As long as a card has been bloomed, it has access to the "Rainbow Road", which is an additional Idol Road that has both cosmetic and strengthening effects. Rainbow Bloomed cards gain a rainbow border, the character's signature, and a certain amount of additional stats in every attribute depending on rarity. Each step on the Rainbow Road requires a Rainbow Key (see #Items), which costs 500 Star Medals each, and a certain amount of Jewels that depends on rarity.
・ Tap on the yellow button to access the card's Rainbow Road. ・ Tap on the pulsing node or the Key/Jewel Check button to check your Key and Jewel supply. ・ You can only advance by tapping on the node and then the yellow button, as long as you have enough resources. ・ Tapping Shop in the corner will redirect you to the Star Medal Shop.
Totals for 100% Completion
Rarity
Small
Medium
Large
Stat Boost
5☆
2000
800
400
+2500
4☆
1500
600
300
+1500
3☆
1000
400
100
+1000
2☆
800
200
50
+600
1☆
500
100
30
+300
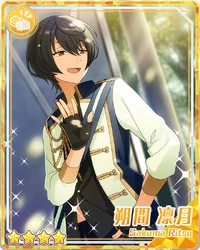
Example of a non-5☆ card's signature vs a 5☆ card's.
Star Medals can be gathered by interacting with animals in lessons. For more specifics, see #Animals. For help locating where you can buy Rainbow Keys, see #School Map.
List of Live Skills & Lesson Skills
List of cards by Lesson Skill & Live Skill A more detailed guide on Jewel drop skills can be found here.
List of Lesson Skills
[Color type]かけら取得数アップ
Increases the acquisition of [Color type] Fragments.
[Color type]ジュエル取得数アップ
Increases the acquisition of [Color type] Jewels.
[Type]ドリフェス能力値アップ
Increases [Attribute] stat in Dreamfes Live.
全員の信頼度上昇率アップ
Increases the rate of raising all Cards' Trust
フィーバー上昇割合アッ
Increases the rate of raising Fever
LUCK 1段階アップ状態でプロデュース開始
Increases Luck by 1 stage at Start of the Lesson.
List of Live Skills
自分の[Type]アップ系
Increases the Card's own [Attribute]
相手の[Type]ダウン系
Decreases the Opponent's [Attribute]
Extra Info About Cards
In regards to receiving duplicates of the same card, they will be automatically fused to same card and will result in a "Limit Break", where the card level increases by 5 and unlocks extra nodes in the Idol Road, leading to a significant increase in potential stats.
A card may only receive up to a total of four limit breaks.
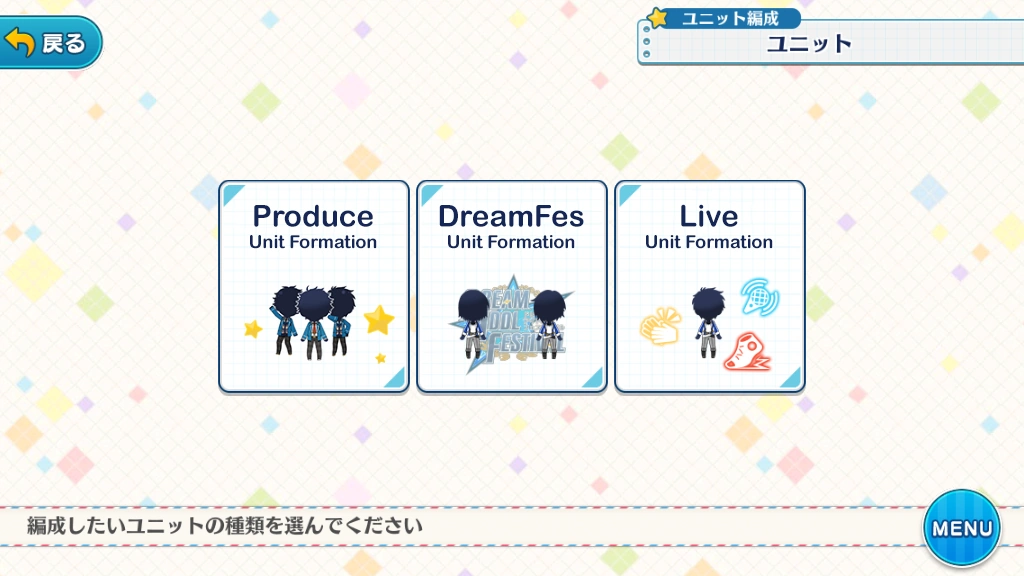
Unit
Unit Formation
Unit Formation Menu
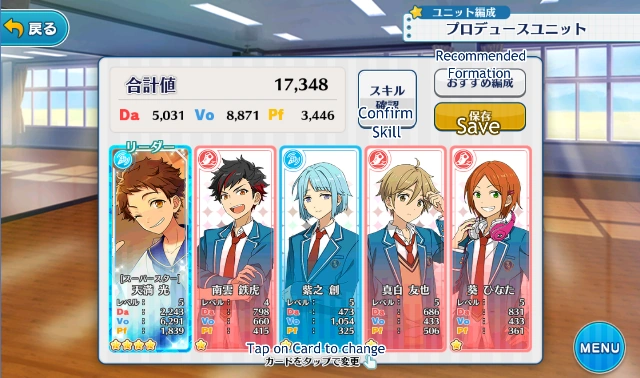
Produce Unit: Organize your unit for general Produce Lessons.
Your cards are arranged into a unit requiring five cards of different characters (For example, if a unit already has Subaru on it, you may not put another Subaru card in a different slot).
Leader postion (リーダー): The leftmost position in a Unit. Used mainly for activation of #Unit Skills.
Confirm Skill: allows you to see what Unit Skill(s) boosts your team has.
Recommended Formation: The game will automatically organize a team for you based on the cards with highest overall stats.
Tip: If you have cards in your card list that are not fully leveled, the Recommended button will auto-add them to your team.
Save: Press to save your changes if you switch any members in or out.
After tapping on card to change to another one, you will get to see your card list. Long-pressing on your cards will show you a brief information window.
Tip: In this mode (as well as when viewing your cards) you can sort your cards by Lesson skills! So if you're trying to build a jewel grinding team for instance, it'll be really easy to find those cards. See #Cards List if you don't know how to switch displays.
You can make four different interchangeable units.
You cannot change your unit when a lesson is still ongoing. If you try do so, a window will pop up telling you that your unit is still in a lesson and you won't be able to save the changes to your unit.
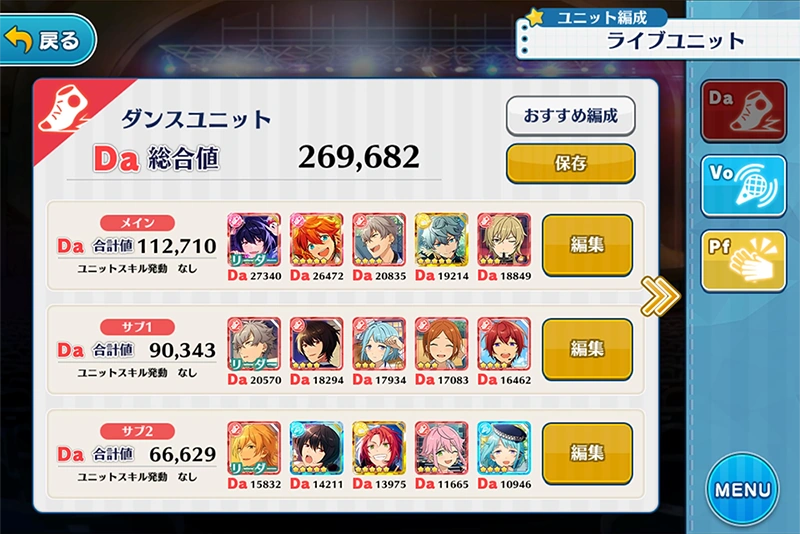
Live Units
Live Unit Menu
Live Units work similarly to the previous types of Units except that there are three rows of Units for one whole Live Unit.
Some people like to differentiate between a Unit row from a whole Live Unit by referring to the whole Live unit as a "team", for example, Dance team, Vocal team, and Performance team.
Unlike other Units, they are sorted by Attribute, and pressing "Recommend Formation" will instead create a team of cards with the strongest stats of that specific attribute.
As seen on the right side, the Units are sorted by Dance, Vocal, and Performance in that order.
Note:#Unit skills here will not affect the whole team, just the individual Unit row it is in.
See the Forming a team section on the Event Guide for more details about Live Units.
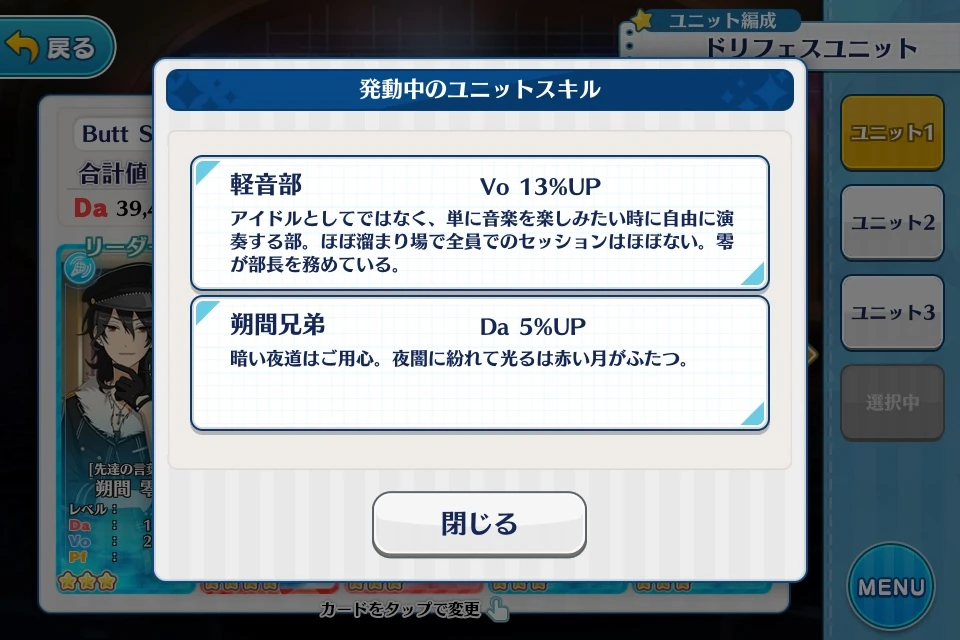
Unit Skills
Unit Skill popup window
Image of current active Unit skills
Unit Skills are special boosts that raise certain stats of your team when certain members of a certain group are put together into a Unit.
In order for a Unit Skill to activate, one of the characters required MUST be the leader of your team.
For example, Subaru must be the set as the leader and the rest of Trickstar have to be in your team to receive the Trickstar Unit Skill boost. If you have a character that is not from Trickstar as your leader but all the characters of Trickstar are in your team, you will not receive the boost.
There are also Limited Time Event Unit Skills, which are correlated to the same characters of the current Limited Time (Gacha) Scout. (You do not need the exact cards from the scout to trigger the Unit Skill. Only the characters are needed.) The Unit Skill will last for the same amount of time as the Limited Time Scout, and will not be available afterwards.
See the Unit Skill page for a list of all possible Unit Skill formations.
Produce Lessons
Officially Lessons are called "Produce Lessons", but people often just shorten it to "Lessons".
Lessons are the main way to level up your cards and increase your rank.
See the Lesson Category page for a detailed list of all available lessons.
Lesson Navigation
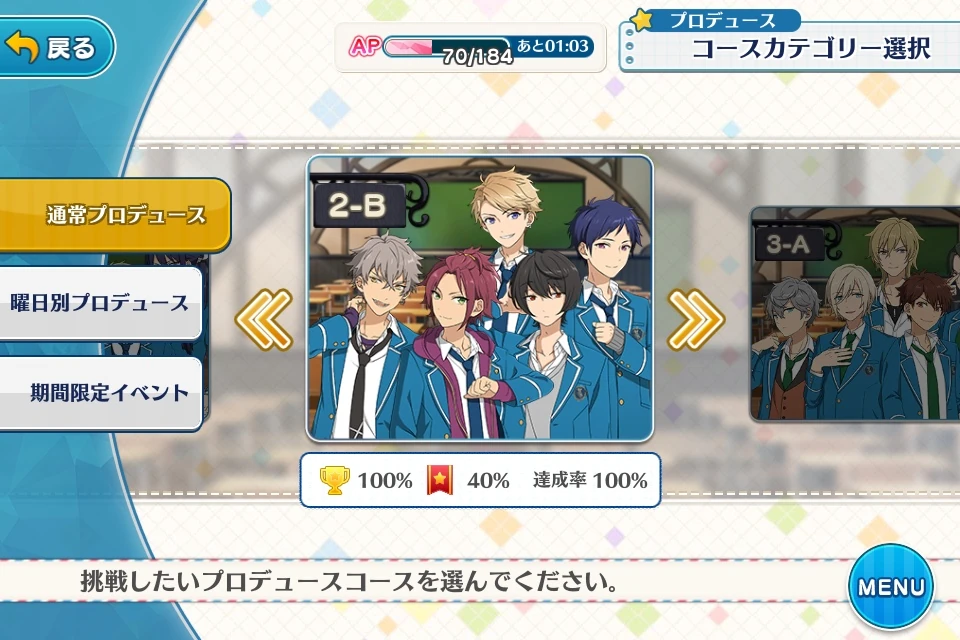
From the left side navigation there are three tabs; those are the three main types of the Lessons. From top to bottom, Main, Daily, and Event, though they may be different types of lessons, gameplay within them are the same.
Main Lessons: Feature the Units and Classes. Each course features on a specific one.
#Daily Lessons: Feature only one set of courses and has a higher chance of obtaining #Jewels of a specific color.
Event Lessons: Found only when a event is ongoing and have a higher chance of receiving Event Lives. Half of the available lessons within it are locked until halfway through an event. See Event Guide for more details.
Tip: During non-event time, the cost of all Lessons are halved, so use this time to grind the courses you need.
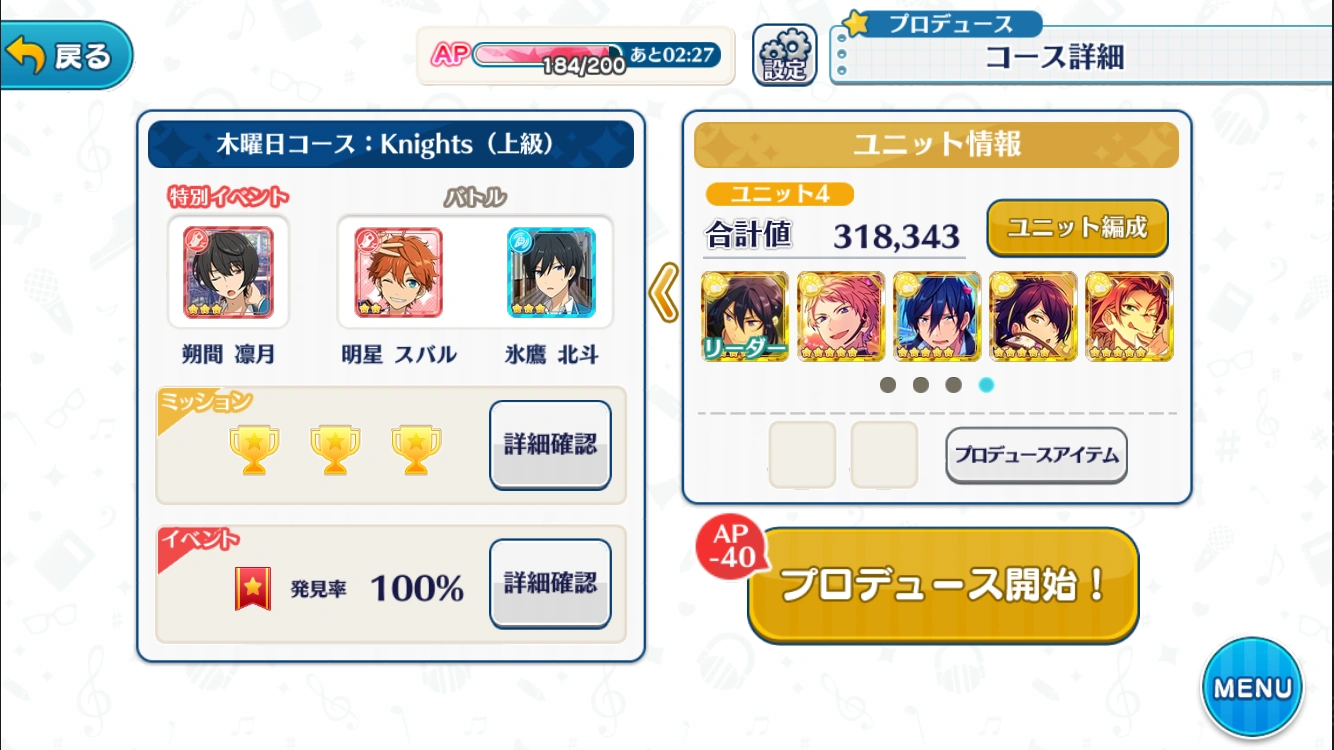
Lesson Information
The Left Box features the lesson information:
Special Event Character: The character near the top left corner. They will be seen along with your unit in the Lesson and will accompany you throughout.
The two characters to the right of the Special Event Character are the characters you will face in the In-Lesson Lives.
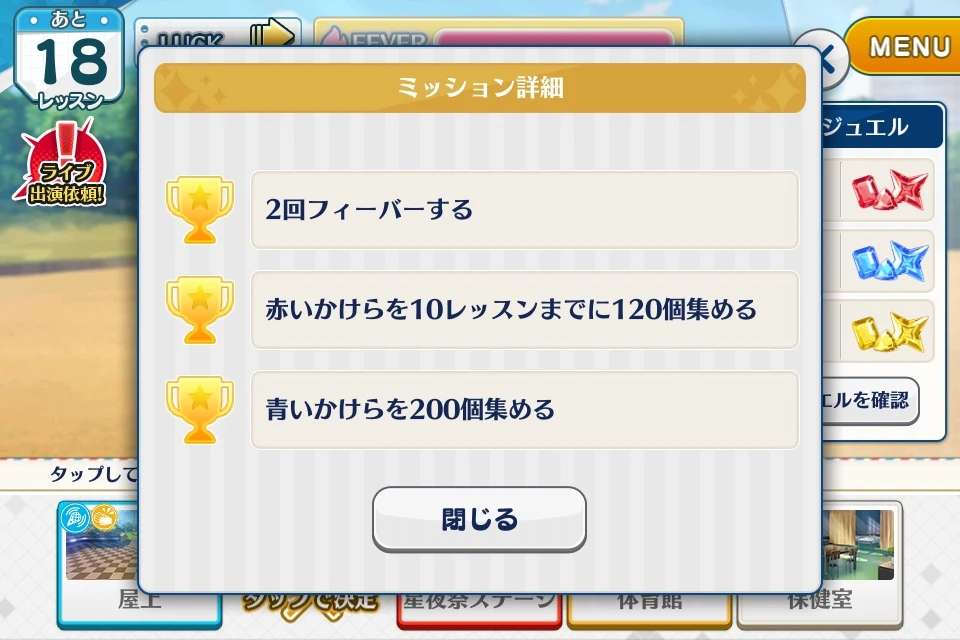
Missions: The box below the characters and marked with a yellow tab. Tapping the button will show you the requirements to complete the missions. There will always be three missions for every lesson.
See #Missions for a translation of all the possible missions.
Events: Box below the missions and marked with a red tab. Tap to see how many events you have completed already.
In a Lesson there are six events overall: 3 Normal Events (★★) & 3 Special Events (★★★).
They have to be activated by talking to the Special Event Character of the lesson. When all Normal Events have been seen, one diamond will be rewarded.
When all Special Events have been seen, one diamond will usually be rewarded. In some of the Main Lessons, Special Events can reward Voice Clips of the Special Event Character.
See the list of Lessons to find translations of the correct options for these events.
Tip: Choosing any option in Daily Lessons will not give you "Luck Down".
The Box on the Right features your Produce Unit:
You can change your team by pressing the button on the upper right. It functions the same way as the #Produce Unit Menu.
If your Produce Unit has the same student with the Special Event Character, their display picture in your Unit will be darkened. You will be asked to whether to proceed to the Lesson without them. If you press the Blue "OK" button to accept, this card will be temporarily absent from your Unit and will not receive any experience points after the Lesson ends.
Clicking on the white button will let you set a Produce item. This functionality is mainly used for Cyalumes, which guarantee a Live on every turn. For more information, see the #Items section.
More About Lessons
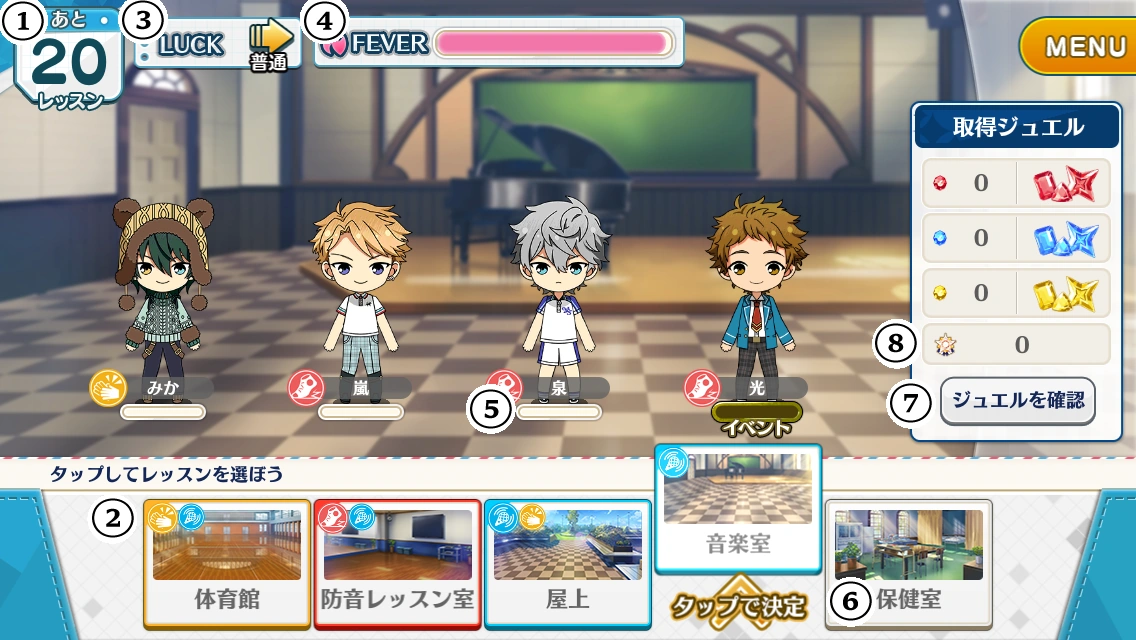
There are 20 turns ① in each Lesson, with a DreamFes Live appearing at turn 11 and 1. Essentially, all you have to do is tap in any one of the given locations at the bottom until the Lesson is over.
Each Location ② is marked with either one or two attribute types, showing which type of Jewel Fragment can be obtained. If the location has two marks, the one on the left is the main fragment type acquired, meaning more of the first type will be received in that area in comparison to type on the right.
Within the Lessons, there is Luck, Fever, and Trust
③ Luck: Can be increased by two stages and decreased by two stages upon the activation of Mini Events. Higher levels of Luck will increase the rate of Trust increase.
④ Fever: The top bar marked with "FEVER." Fills up after each turn with the amount of increase depending on how many characters were on the location selected. See #Fever for more details.
Once Fever is activated, acquisition of jewel fragments is increased for five turns and if it is still active during a DreamFes Live, the unit will receive a 1.5x boost.
⑤ Trust: The bar under the idols which are filled up when the idols are trained with. See #Trust for more details.
Higher Trust will increase the chance of triggering a Normal/Special/Mini Event with the character. The amount of Trust a character has at the end of the Lesson also affects the amount of EXP the card gains.
Touching an area with no idols in it results in a Mini Event with Akiomi Kunugi, which will allow you a chance to increase the rate of Fever or give you a decrease in Luck.
Note that if you touch an area with idols, you are guaranteed that the same area will have idols in it again on the next turn.
Touching the area to the far right is the Infirmary ⑥, where you can activate Mini Events with Jin Sagami and have a chance to increase your Luck by one stage or two.
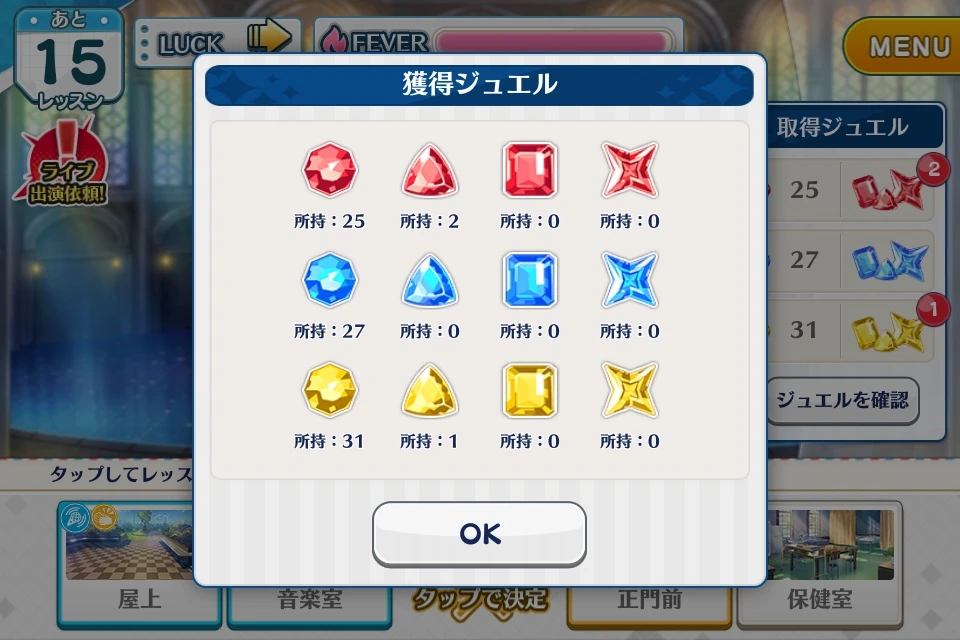
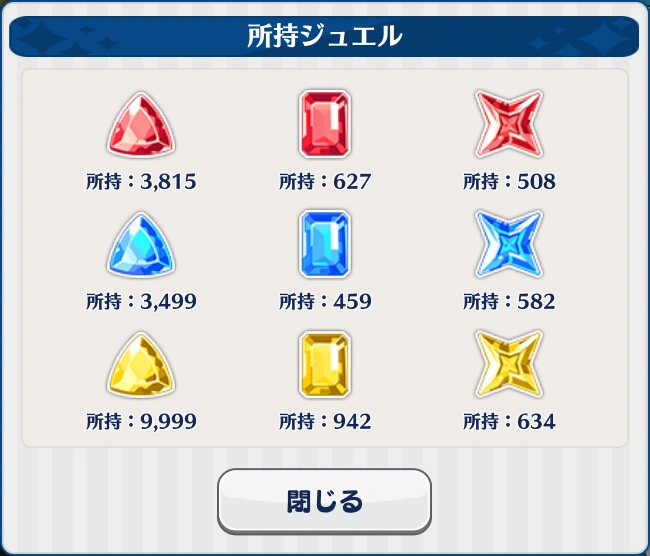
⑦ Check Jewel: Allows you to check the amount of Fragment, Small, Medium, and Large #Jewels you currently have obtained in the Lesson.
⑧ Right above Check Jewel is where the amount of Star Medals you have is shown. Star Medals are collected when interacting with locations with #Animals. They are used to buy cards and Rainbow Keys from the Star Medal Shop.
Upon completion of a Lesson, you will obtain Jewels, Producer Points, Star Medals, and EXP for yourself and the cards.
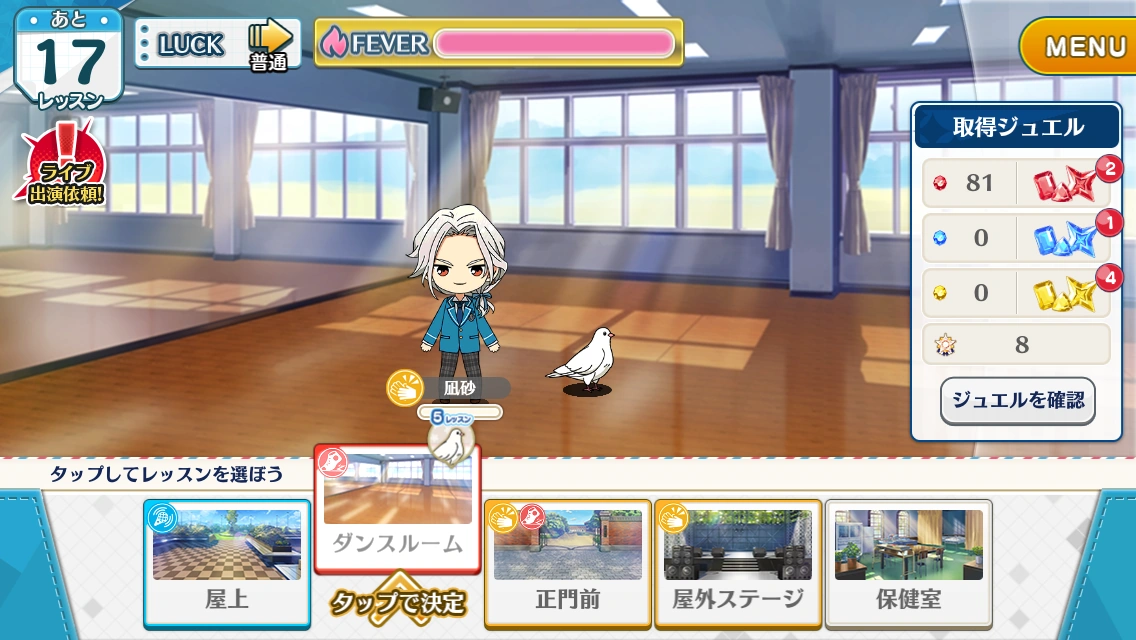
Animals
Sometimes certain animals (shown below) will appear in lessons. Depending on the holiday, they may have various costumes. Visiting the same locations as them will give you Star Medals, a currency used to buy specific cards and Rainbow Keys, used to rainbow bloom cards.
Normally, doves will give 1-2 Medals, Daikichi will give you 4-6, and Leon will give you 8-12. This amount is doubled during Fever. While they usually appear alone, more Star Medals are given when two or more are in the same location.
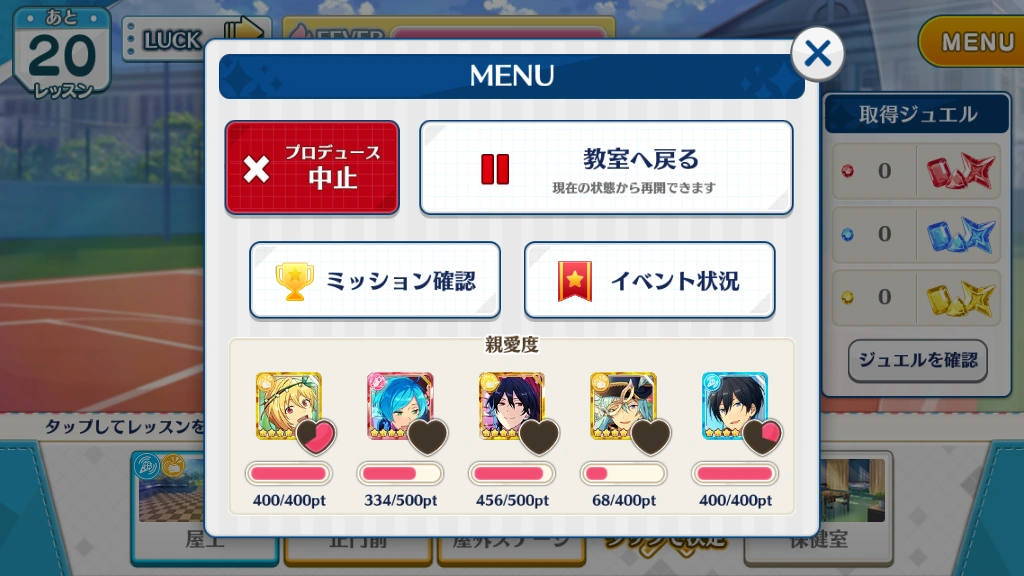
The Menu can be accessed in the upper right hand corner.
The top-left, red button allows make you quit the lesson. (You can no longer return to the lesson again.)
The top-right button allows you to exit the lesson. (You can resume the lesson once again.)
The button with the trophy lets you review the missions.
The button with the ribbon lets you review what events you have seen.
The bottom section allows you to see how many more heart pieces will be needed before you can activate an #Intimate Event with the character.
The fraction below is the max number of Intimacy Points you can receive with each card.
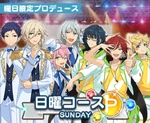
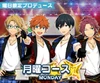
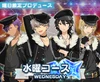
Daily Lessons
Images lead to the courses' respective pages, which contain information about mission translations and in-lesson live strengths.
Daily Lessons are useful because they increase the drop rate of a specific color of jewels on a specific day.
They are incredibly important to grind as there is always an unending need for jewels to increase the strength of your cards, so knowing when they come into rotation is important to make sure you have enough materials to build up your teams quickly.
Tip: Setting frequent 8 hour Managements can allow you to collect an excess of all types of Jewels, which is extremely helpful.
Note: Daily Lessons rotate at 12AM JST so keep that mind for whatever timezone you may be playing in.
Days when the courses come into rotation:
Red Jewels: Tuesday & Friday
Blue Jewels: Wednesday & Saturday
Yellow Jewels: Monday & Thursday
The only anomaly to daily rotating jewel courses is the Sunday course.
The Sunday course is special in that it doesn't increase the drop rate of a specific color of jewels but you get 2x EXP for the same AP cost as the other daily courses.
More Producer Points than usual may be gained from these courses as well.
It is especially good to use this course to level up cards quickly, or to gain extra LP by leveling up your Player Rank.
Just make sure not to have too weak cards in your Unit (i.e. not all level 1) as the DreamFes battles in this Lesson are especially strong.
Trust
The more Trust a character has, the chances of triggering a Normal/Special/Mini Event with the character increases. The amount of Trust a character has at the end of the Lesson also affects the amount of EXP the card gains.
Tip: The less people on the the map, the faster the Trust bar will fill up, increasing the EXP multiplier that the character will get at the end of the lesson.
Tip: The higher your luck (the arrow near the Fever bar) the more Trust you get, so visiting the infirmary on the first day can be helpful.
You do not need to fill the bar up to get the best multiplier! The bar only needs to turn pink to make the most of the multiplier.
Different Levels of Multipliers
Exact multipliers are unknown because no one has counted them. All you need to know is that filling the bar to pink helps A LOT.
If you plan well you get up to two characters' trust bar to pink in a Lesson.
If you have a card with a Trust Up skill on your team and choose the maps extra well, it is possible to fill up to three characters' trust bar up to pink in one Lesson!
Fever
Fever has a few main uses:
Increasing the acquisition of jewel fragments for the duration of the Fever (5 turns).
Giving your unit a 1.5x boost during a DreamFes Live in entered during a Fever.
There is a misconception about this, but Fevers don't affect Event Lives (the ones that pop up randomly, not the DreamFes Lives in an Event Lesson).
How to increase Fever quickly & use it for Missions
Missions often require Fevers to be triggered in Lesson a variety of ways.
Because the Fever bar carries over across Lessons it might be hard to fill it up properly to complete the mission if you don't strategize beforehand.
First choose a low-cost AP Lesson to enter, then we'll cover over how to quickly fill your Fever bar up.
Key Note: The less characters there are on a location tab, the more the Fever bar will fill up.
1 person - Improves Fever very greatly
2 people - Improves Fever greatly
3 people - Improves Fever a fair amount
4 people - Improves Fever a little
If you have any Fever up cards (look for cards with フィーバー in the Lesson Skill section, see #Produce Unit on how to sort cards by skills.), those are very helpful for increasing the rate at which the Fever bar fills up.
Cards with Fever skills also stack up so putting a few in your unit would be helpful. However, it wouldn't be advised to put more than 2 cause it feels like an overload otherwise, especially if you have other cards to train.
Once you've filled up the Fever bar to about 1 or 2 turns before it triggers, Quit the Lesson (the red button in the #Lesson Menu).
Like mentioned before, the Fever level carries over across Lessons, that still stands when quitting a Lesson.
Tip: If you don't want to quit the Lesson, you can continue to save the level of the Fever Bar by continually going to the Infirmary as it won't raise your Fever level.
Now you can complete the Get Fever within 5 Turns and Get 2x Fever in a Lesson Mission objectives fairly easily.
To complete, Get Fever within 5 Turns, just enter the Lesson with your nearly filled Fever bar and trigger the Fever.
To complete, Get 2x Fever in a Lesson, enter the Lesson with your nearly filled Fever bar and trigger the Fever. Then simply use the method described earlier with only choosing the location tabs with the least amount of people to fill up the Fever bar quickly to quickly trigger Fever again before the Lesson ends.
(From Left to Right, the Jewel Sizes are: Fragment, Small, Medium, and Large)
Jewels (Also called "Gems" by some) are items which can be obtained in Lessons from random drops throughout the Lesson. They are used to unlock nodes on a card's #Idol Road in order to strengthen it.
Fragments are obtained by progressing through the Lesson or as Mini Event rewards.
For every 100 Fragments of a color obtained by the end of the lesson, they will be converted into one corresponding Small Jewel of that color.
All sizes of Jewels (Small, Medium, and Large) can drop in a Lesson.
Jewel Drop Skills
There are cards that help increase the drop rate of Jewels.
For a detailed explanation of identifying those cards see here.
Putting cards with skills that increase the rate of Jewel Drops can greatly help in obtaining more jewels. Just make sure not to forgot to unlock the Lesson node that strengthens that skill or else it won't really improve the jewel drop rate much!
Notable starters that increase Jewel Drops of all Color and Size
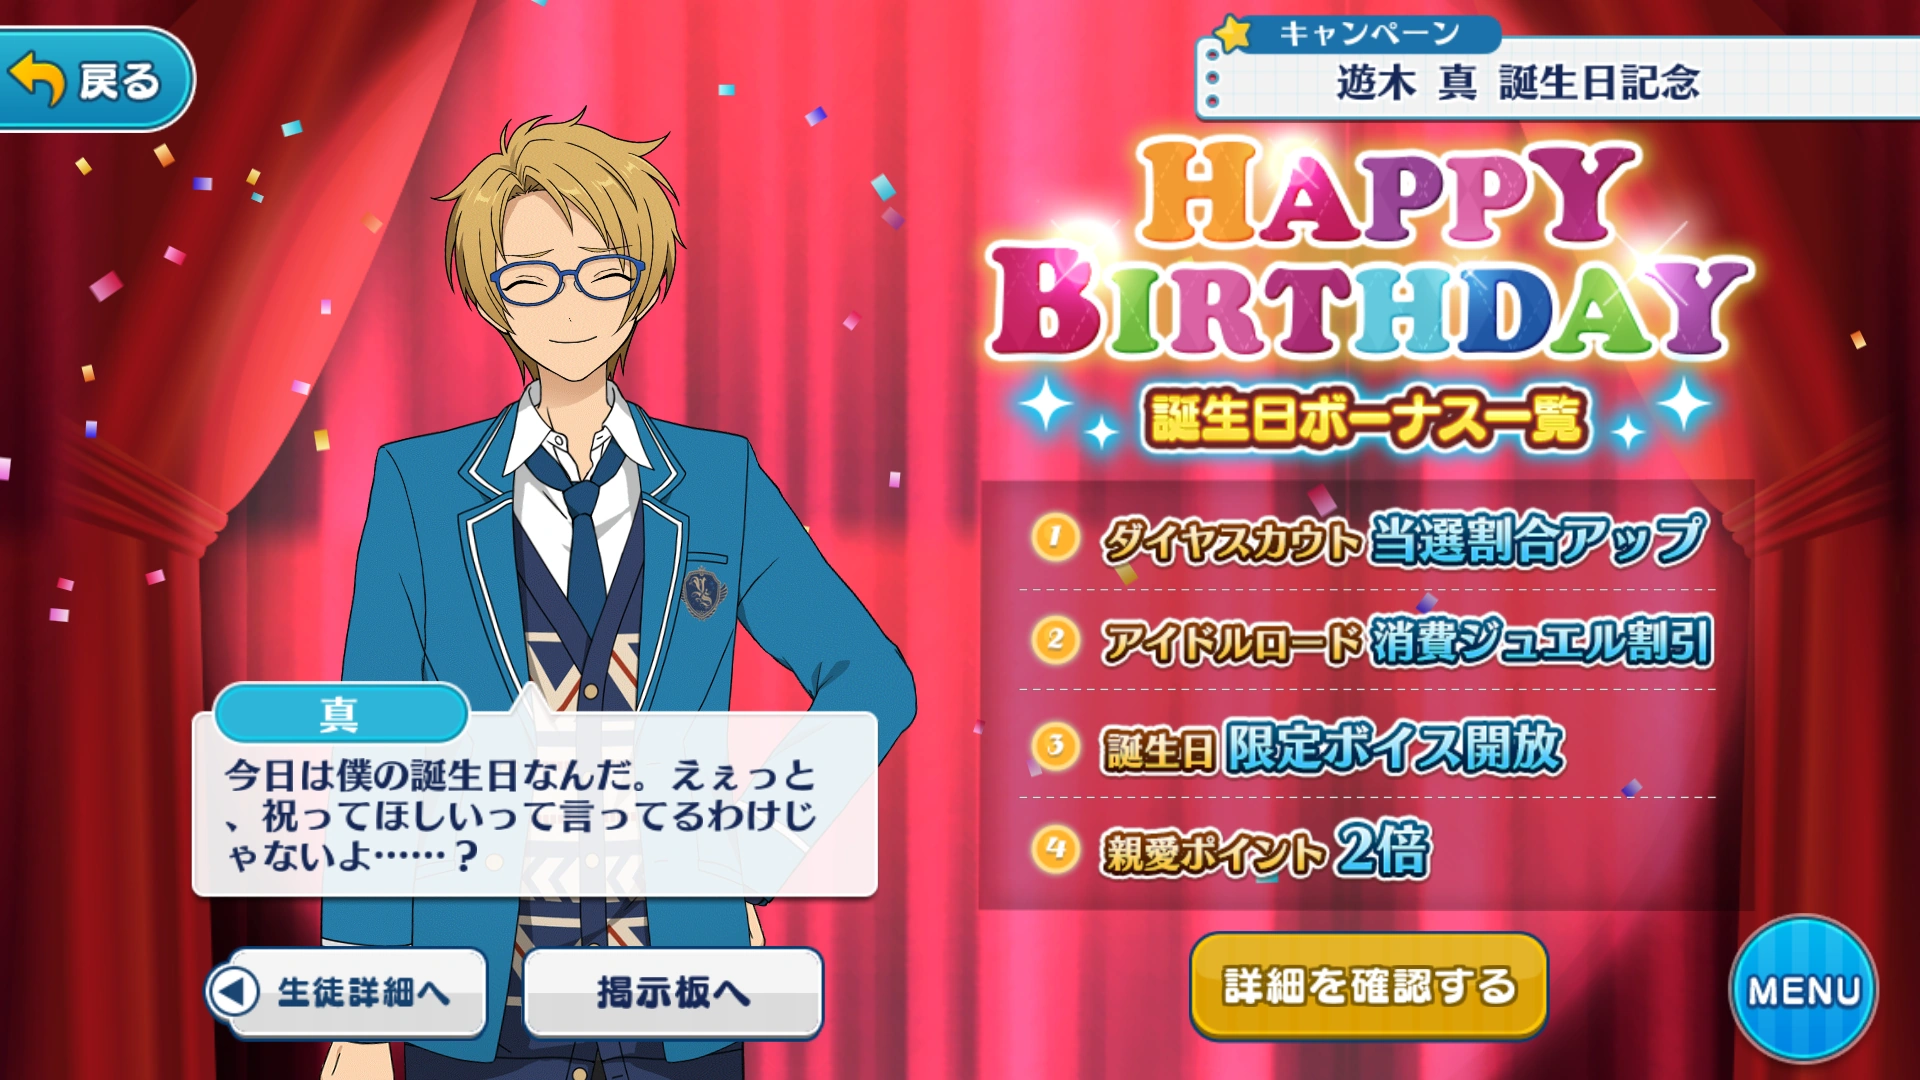
The above banner will be displayed on the home screen, so you'll know if the campaign is active.
The game will wish you happy birthday as you log in. Clicking on the blackboard, which says "Producer! Come to the auditorium ☆ -Subaru", it will play a sequence of birthday greetings.
You will obtain 30 Diamonds, 250 Star Medals, 250 Yumecoins, 30 of each Large Jewel, 50 of each Medium Jewel, and 100 of each Small Jewel.
You are guaranteed to get one 5☆ by scouting in the designated birthday box for 135 dia.
All idol roads will take less jewels to unlock nodes.
A Birthday voice clip will unlocked for every character.
You will get double Intimacy Points for everyone in Intimate Events.


