No edit summary Tag: rte-source |
Emuy (Message Wall | contribs) No edit summary Tag: sourceedit |
||
| Line 1: | Line 1: | ||
| + | {{EventDesc |
||
| − | [[File:Brilliance★Knights' Starlight Festival Banner.png|420px|right|link=]] |
||
| + | |Event = Brilliance★Knights' Starlight Festival |
||
| − | <i>"A snowy December. Tsukasa and Leo find Arashi alone on the school grounds. As he seems to be lost in thought, Tsukasa is worried, but..."</i> |
||
| + | |Description = A snowy December. Tsukasa and Leo find Arashi alone on the school grounds. As he seems to be lost in thought, Tsukasa is worried, but... |
||
| − | |||
| + | |Start = 11/30/16 at 15:00 JST |
||
| − | ==Duration== |
||
| − | + | |End = 12/10/16 at 22:00 JST |
|
| + | |Revival = |
||
| − | '''End:''' 12/10/16 at 22:00 JST |
||
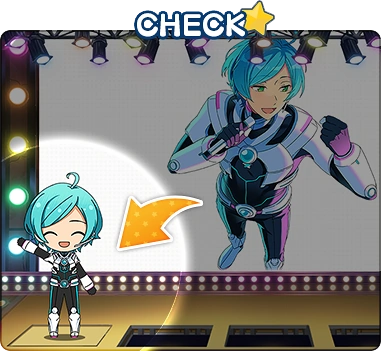
| + | |Chibi = Tsukasa Suou StarFes |
||
| − | |||
| + | |}} |
||
| − | ==How to Play== |
||
| − | [[File:Event Point.png|right|60px]] |
||
| − | *To join the event, make sure you already completed your [[Beginner Tasks]]. |
||
| − | *As you complete 'Lives', event points will be awarded. |
||
| − | *To collect the bonuses, click on the yellow button that appears beside the cleared objective. It will be sent to your Gift Box that can be accessed on My Room. |
||
| − | *[[:Category:Event_Story|Event Stories]] can be read again under the Event tab in Story. |
||
| − | * Read more at [[Event Guide]]. |
||
| − | |||
| − | ==Food Items== |
||
| − | *Food Items gotten from event point bonus are only usable till the end of this event. |
||
| − | [[File:Konpeitou.png|44px]] 1 Konpeito recovers 1 LP [[File:Sweat_star_sports_drink.png|44px]] 1 Sports Drink recovers full LP [[File:Yakisobapan.png|44px]] 1 Yakisoba bread recovers full AP |
||
==Event== |
==Event== |
||
<tabber> |
<tabber> |
||
Lesson= |
Lesson= |
||
| + | {{EventLesson |
||
| − | {|cellspacing="1/6" cellpadding="2" border="1" align="center" width="640px" class="article-table" style="line-height:10px" |
||
| + | |Event = Brilliance★Knights' Starlight Festival |
||
| − | | colspan="4" style="text-align:center;background-color:#648EC6; color:#fff; padding:20px;"|<font size="4">'''Lesson'''</font> |
||
| + | |color1 = #648EC6 |
||
| − | |- |
||
| + | |color2 = #F8D57C |
||
| − | |style="text-align:center"|'''Cost: 10 AP & 20 AP''' |
||
| + | |color3 = #CBE0E7 |
||
| − | |colspan="2" style="text-align:center"|'''Producer Points Gained: XXX''' |
||
| + | |AP = 10 AP & 20 |
||
| − | |style="text-align:center"|'''EXP Gained: 100, 200''' |
||
| + | |Producer Points = 100 & 200 |
||
| − | |- |
||
| + | |EXP Gained = 100 & 200 |
||
| − | |colspan="4"|[[File:Brilliance★Knights' Starlight Festival.png|500px|center|link=]] |
||
| + | |Date = 12/5 (15:00 JST) |
||
| − | |- |
||
| + | |Dcolor = #587CAC |
||
| − | | colspan="1" rowspan="3" style="text-align:center;background-color:#F8D57C;color:#fff;font-size:16px;"|''' Izumi Sena ''' |
||
| − | |<center>'''Special Event:'''</center> |
||
| − | |<center>'''Rival 1:'''</center> |
||
| − | |<center>'''Rival 2:'''</center> |
||
| − | |- |
||
| − | | [[File:(Blessed Smile) Izumi Sena mini.png|70px|center|link=]] |
||
| − | | [[File:(Academy Idol) Mitsuru Tenma mini.png|70px|center|link=]] |
||
| − | | [[File:(Academy Idol) Eichi Tenshouin mini.png|70px|center|link=]] |
||
| − | |- |
||
| − | |'''Total Stats:''' |
||
| − | |style="text-align:center;"| 9,360 |
||
| − | |style="text-align:center;"| 12,785 |
||
| − | |- |
||
| − | |rowspan="3"|<center>'''Missions:'''</center> |
||
| − | |colspan="3"|[[File:Trophy_mini.png|25px]] Collect 100 Blue Fragments within 10 Lessons |
||
| − | |- |
||
| − | |colspan="3"|[[File:Trophy_mini.png|25px]] Collect 150 Yellow Fragments |
||
| − | |- |
||
| − | |colspan="3"|[[File:Trophy_mini.png|25px]] Raise Izumi's Trust to 100% |
||
| − | |- |
||
| − | |colspan="1" rowspan="2"|<center>'''Events:'''</center> |
||
| − | |colspan="3"|[[File:Normal_Event_mini.png|25px]] [[Brilliance★Knights' Starlight Festival/Izumi Sena Normal Event|★★ Event - Christmas Present]] |
||
| − | |- |
||
| − | |colspan="3"|[[File:Special_Event_mini.png|25px]] [[Brilliance★Knights' Starlight Festival/Izumi Sena Special Event|★★★ Event - Big Brother is Worried]] |
||
| − | |- |
||
| − | |<center>'''Locations:'''</center> |
||
| − | |colspan="3"| [[File:Brilliance★Knights' Starlight Festival Izumi Sena locations.png|400px|center]] |
||
| − | |- |
||
| − | | colspan="1" rowspan="3" style="text-align:center;background-color:#CBE0E7;color:#fff;font-size:16px;"|''' Tsukasa Suou ''' |
||
| − | |<center>'''Special Event:'''</center> |
||
| − | |<center>'''Rival 1:'''</center> |
||
| − | |<center>'''Rival 2:'''</center> |
||
| − | |- |
||
| − | | [[File:(Aligned Stage) Tsukasa Suou mini.png|70px|center|link=]] |
||
| − | | [[File:(Academy Idol) Koga Oogami mini.png|70px|center|link=]] |
||
| − | | [[File:(Academy Idol) Shinobu Sengoku mini.png|70px|center|link=]] |
||
| − | |- |
||
| − | |'''Total Stats:''' |
||
| − | |style="text-align:center;"| 11,550 |
||
| − | |style="text-align:center;"| 20,189 |
||
| − | |- |
||
| − | |rowspan="3"|<center>'''Missions:'''</center> |
||
| − | |colspan="3"|[[File:Trophy_mini.png|25px]] Trigger 2 Fevers |
||
| − | |- |
||
| − | |colspan="3"|[[File:Trophy_mini.png|25px]] Collect 80 Fragments of Each Color within 10 Lessons |
||
| − | |- |
||
| − | |colspan="3"|[[File:Trophy_mini.png|25px]] Collect 250 Red Fragments |
||
| − | |- |
||
| − | |colspan="1" rowspan="2"|<center>'''Events:'''</center> |
||
| − | |colspan="3"|[[File:Normal_Event_mini.png|25px]] [[Brilliance★Knights' Starlight Festival/Tsukasa Suou Normal Event|★★ Event - 冬の過ごし方]] |
||
| − | |- |
||
| − | |colspan="3"|[[File:Special_Event_mini.png|25px]] [[Brilliance★Knights' Starlight Festival/Tsukasa Suou Special Event|★★★ Event - Tension]] |
||
| − | |- |
||
| − | |<center>'''Locations:'''</center> |
||
| − | |colspan="3"| [[File:Brilliance★Knights' Starlight Festival Tsukasa Suou locations.png|400px|center]] |
||
| − | |- |
||
| − | | colspan="4" style="text-align:center;background-color:#648EC6;color:#587CAC;"|<center><font size="4">Unavailable until 12/5 (15:00 JST)</font></center> |
||
| − | |- |
||
| − | | colspan="1" rowspan="3" style="text-align:center;background-color:#F8D57C;color:#fff;font-size:16px;"|''' Arashi Narukami ''' |
||
| − | |<center>'''Special Event:'''</center> |
||
| − | |<center>'''Rival 1:'''</center> |
||
| − | |<center>'''Rival 2:'''</center> |
||
| − | |- |
||
| − | | [[File:(Holy Knight of Silver) Arashi Narukami mini.png|70px|center|link=]] |
||
| − | | [[File:(Meat Diet) Adonis Otogari mini.png|70px|center|link=]] |
||
| − | | [[File:(Studying) Tetora Nagumo mini.png|70px|center|link=]] |
||
| − | |- |
||
| − | |'''Total Stats:''' |
||
| − | |style="text-align:center;"| 16,980 |
||
| − | |style="text-align:center;"| 29,161 |
||
| − | |- |
||
| − | |rowspan="3"|<center>'''Missions:'''</center> |
||
| − | |colspan="3"|[[File:Trophy_mini.png|25px]] Complete with Highest Luck |
||
| − | |- |
||
| − | |colspan="3"|[[File:Trophy_mini.png|25px]] Raise Arashi's Trust to 100% |
||
| − | |- |
||
| − | |colspan="3"|[[File:Trophy_mini.png|25px]] Collect 100 Blue Fragments within 10 Lessons |
||
| − | |- |
||
| − | |colspan="1" rowspan="2"|<center>'''Events:'''</center> |
||
| − | |colspan="3"|[[File:Normal_Event_mini.png|25px]] [[Brilliance★Knights' Starlight Festival/Arashi Narukami Normal Event|★★ Event - ものうげな冬]] |
||
| − | |- |
||
| − | |colspan="3"|[[File:Special_Event_mini.png|25px]] [[Brilliance★Knights' Starlight Festival/Arashi Narukami Special Event|★★★ Event - Christmas Party]] |
||
| − | |- |
||
| − | |<center>'''Locations:'''</center> |
||
| − | |colspan="3"| [[File:Brilliance★Knights' Starlight Festival Arashi Narukami locations.png|400px|center]] |
||
| − | |- |
||
| − | | colspan="1" rowspan="3" style="text-align:center;background-color:#CBE0E7;color:#fff;font-size:16px;"|''' Leo Tsukinaga ''' |
||
| − | |<center>'''Special Event:'''</center> |
||
| − | |<center>'''Rival 1:'''</center> |
||
| − | |<center>'''Rival 2:'''</center> |
||
| − | |- |
||
| − | | [[File:(Holy Knight of the Golden Lion) Leo Tsukinaga mini.png|70px|center|link=]] |
||
| − | | [[File:(Studying) Tetora Nagumo mini.png|70px|center|link=]] |
||
| − | | [[File:(Secret Training) Nazuna Nito mini.png|70px|center|link=]] |
||
| − | |- |
||
| − | |'''Total Stats:''' |
||
| − | |style="text-align:center;"| 19,440 |
||
| − | |style="text-align:center;"| 37,011 |
||
| − | |- |
||
| − | |rowspan="3"|<center>'''Missions:'''</center> |
||
| − | |colspan="3"|[[File:Trophy_mini.png|25px]] Trigger 2 Fevers |
||
| − | |- |
||
| − | |colspan="3"|[[File:Trophy_mini.png|25px]] Collect 250 Yellow Fragments |
||
| − | |- |
||
| − | |colspan="3"|[[File:Trophy_mini.png|25px]] Collect 80 Fragments of Each Color within 10 Lessons |
||
| − | |- |
||
| − | |colspan="1" rowspan="2"|<center>'''Events:'''</center> |
||
| − | |colspan="3"|[[File:Normal_Event_mini.png|25px]] [[Brilliance★Knights' Starlight Festival/Leo Tsukinaga Normal Event|★★ Event - 寒いのは苦手]] |
||
| − | |- |
||
| − | |colspan="3"|[[File:Special_Event_mini.png|25px]] [[Brilliance★Knights' Starlight Festival/Leo Tsukinaga Special Event|★★★ Event - 真冬のお祝い]] |
||
| − | |- |
||
| − | |<center>'''Locations:'''</center> |
||
| − | |colspan="3"| [[File:Brilliance★Knights' Starlight Festival Leo Tsukinaga locations.png|400px|center]] |
||
| − | |} |
||
| − | |-| |
||
| − | Live= |
||
| − | {| cellspacing="1" cellpadding="2" border="1" align="center" width="100%" class="article-table" style="line-height:10px" |
||
| − | |- |
||
| − | ! scope="col" style="text-align:center;background-color:#F8D57C;color:#fff;font-size:17px;padding:12px;"| Normal Lives |
||
| − | |- |
||
| − | | [[File:Brilliance★Knights' Starlight Festival Normal1.png|215px|link=]] [[File:Brilliance★Knights' Starlight Festival Normal2.png|215px|link=]] [[File:Brilliance★Knights' Starlight Festival Normal3.png|215px|link=]] |
||
| − | |- |
||
| − | ! scope="col" style="text-align:center;background-color:#F8D57C;color:#fff;font-size:17px;padding:12px;"| Rare Lives |
||
| − | |- |
||
| − | | [[File:Brilliance★Knights' Starlight Festival Rare1.png|215px|link=]] [[File:Brilliance★Knights' Starlight Festival Rare2.png|215px|link=]] [[File:Brilliance★Knights' Starlight Festival Rare3.png|215px|link=]] |
||
| − | |- |
||
| − | ! scope="col" style="text-align:center;background-color:#F8D57C;color:#fff;font-size:17px;padding:12px;"| Emergency Live |
||
| − | |- |
||
| − | | [[File:Brilliance★Knights' Starlight Festival Emergency.png|215px|link=]] |
||
| − | |} |
||
| + | |Name A = Izumi Sena |
||
| − | ==Brief Summary== |
||
| + | |Special Event A = (Blessed Smile) Izumi Sena |
||
| − | *'Live's will appear randomly during Lessons. They can appear in normal Lessons, but the appearance rate is lower than that during Event Lessons. |
||
| + | |Rival1A = (Academy Idol) Mitsuru Tenma |
||
| + | |Stats1A = 9,360 |
||
| + | |Rival2A = (Academy Idol) Eichi Tenshouin |
||
| + | |Stats2A = 12,785 |
||
| + | |Mission 1A = Collect 100 Blue Fragments within 10 Lessons |
||
| + | |Mission 2A = Collect 150 Yellow Fragments |
||
| + | |Mission 3A = Raise Izumi's Trust to 100% |
||
| + | |Event Name A = Christmas Present |
||
| + | |Event Name A2 = Big Brother is Worried |
||
| + | |Name B = Tsukasa Suou |
||
| − | * There are three different difficulty of Lives: Normal, Rare and Emergency: |
||
| + | |Special Event B = (Aligned Stage) Tsukasa Suou |
||
| − | <blockquote> |
||
| + | |Rival1B = (Academy Idol) Koga Oogami |
||
| − | *Normal lives can be attempted within 2hrs. |
||
| + | |Stats1B = 11,550 |
||
| − | *Rare lives can be attempted within 1hr. |
||
| + | |Rival2B = (Academy Idol) Shinobu Sengoku |
||
| − | *Emergency lives can be attempted within 10mins.</blockquote> |
||
| + | |Stats2B = 20,189 |
||
| + | |Mission 1B = Trigger 2 Fevers |
||
| + | |Mission 2B = Collect 80 Fragments of Each Color within 10 Lessons |
||
| + | |Mission 3B = Collect 250 Red Fragments |
||
| + | |Event Name B = 冬の過ごし方 |
||
| + | |Event Name B2 = Tension |
||
| + | |Name C = Arashi Narukami |
||
| − | *The maximum levels for each grade of card is as follows: |
||
| + | |Special Event C = (Holy Knight of Silver) Arashi Narukami |
||
| − | <blockquote> |
||
| + | |Rival1C = (Meat Diet) Adonis Otogari |
||
| − | *Normal: Lvl45<br> |
||
| + | |Stats1C = 16,980 |
||
| − | *Rare: Lvl30<br> |
||
| + | |Rival2C = (Studying) Tetora Nagumo |
||
| − | *Emergency: Lvl15 </blockquote> |
||
| + | |Stats2C = 29,161 |
||
| − | |||
| + | |Mission 1C = Complete with Highest Luck |
||
| − | *Every time you complete a card's Live, it will gain a level the next time you encounter it. However, there is a LP-spent cutoff before it drops back to one level down. For Normal Lives, it is 3LP. For Rare Lives, it is 4LP. For Emergency Lives, it is 6LP (do take note that since the live only lasts for 10mins, you cannot wait for LP to regenerate. You will need to use dias or food items to restore the 6th LP. So plan before you attempt it and use the first 3LP). |
||
| + | |Mission 2C = Raise Arashi's Trust to 100% |
||
| − | |||
| + | |Mission 3C = Collect 100 Blue Fragments within 10 Lessons |
||
| − | *The three buttons below are options for the number of units you want to use for the Live: |
||
| + | |Event Name C = ものうげな冬 |
||
| − | <blockquote> |
||
| + | |Event Name C2 = Christmas Party |
||
| − | *Selecting One unit(cost: 1LP) gives no bonus. <br> |
||
| − | *Selecting Two units(cost: 2LP) gives 1.5x bonus. <br> |
||
| − | *Selecting Three Units(cost:3LP) gives 2x bonus.</blockquote> |
||
| − | |||
| − | *It is possible to get 200 producer points or the cards as drops after the Live. They will be sent your gift box. |
||
| − | |||
| − | ==Brief Encore Summary== |
||
| − | After finishing a live (normal, rare or emergency), there is a chance an encore will appear. If an encore has not appeared within 5 lives, the next one will be guaranteed.<br><br> |
||
| − | *When you get an encore, a roulette will appear. |
||
| − | **Before you start on the Encore there might be a spinning number and the finalized number (can be 1 to 5) is the number of people you have to AT LEAST clear for the bouquet bonus. |
||
| − | **The roulette will contain members from your main unit of your Live units (follows the type of Live). |
||
| − | **The AUTO button will automatically spin all 5 chances for you. |
||
| − | **The more characters you get on stage, the more bonus points you'll get. |
||
| − | **Higher level lives as well as cards with higher stats will give you more bonus points. |
||
| − | <br> |
||
| − | *The bonus points you get will depend on the type of live you've triggered. |
||
| − | **Normal = will give you a small amount of bonus points. |
||
| − | **Rare = will give you a medium amount of bonus points. |
||
| − | **Emergency = will give you a lot of bonus points. |
||
| − | <br> |
||
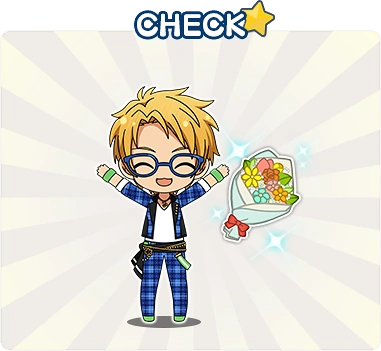
| − | *Every 5 encores, a bar will appear letting you know how many characters you need to get on stage to receive a bouquet. |
||
| − | **Successfully getting a bouquet will give you an extra 1,000 points. |
||
| − | **If you fail, bouquets will continue to appear for every encore until you succeed. |
||
| − | <br> |
||
| − | {| cellspacing="0" cellpadding="2" align="center" width="100%" style="font-size:12px; line-height:14px; text-align:center;" |
||
| − | |- |
||
| − | | style="border:1px solid #C8B890;"|[[File:Encore_Example1.png|center|300px|character appearing on stage]]<br> |
||
| − | When it lands on a character, he will then appear on stage. |
||
| − | | style="border:1px solid #C8B890;border-left:none;text-align:center;"|[[File:Encore_Example2.png|center|300px|character appearing on stage]]<br> |
||
| − | If the roulette lands on the character that's already on stage,<br> he will not appear on stage again. |
||
| − | |- |
||
| − | | style="border:1px solid #C8B890;"|[[File:Encore_Example3.png|center|300px|character appearing on stage]] |
||
| − | If you get all the characters in you team on stage, <br> you'll get bonus event points. |
||
| − | | style="border:1px solid #C8B890;border-left:none;text-align:center;"|[[File:Encore_Example4.png|center|300px|character appearing on stage]]<br> |
||
| − | During an encore, you may or may not get a bouquet. |
||
| − | |}<br><br> |
||
| − | |||
| − | <center>It's all about RNG luck. Read more in-depth about the new Encore Live System [[:Thread:23064|here]].</center> |
||
| + | |Name D = Leo Tsukinaga |
||
| + | |Special Event D = (Holy Knight of the Golden Lion) Leo Tsukinaga |
||
| + | |Rival1D = (Studying) Tetora Nagumo |
||
| + | |Stats1D = 19,440 |
||
| + | |Rival2D = (Secret Training) Nazuna Nito |
||
| + | |Stats2D = 37,011 |
||
| + | |Mission 1D = Trigger 2 Fevers |
||
| + | |Mission 2D = Collect 250 Yellow Fragments |
||
| + | |Mission 3D = Collect 80 Fragments of Each Color within 10 Lessons |
||
| + | |Event Name D = 寒いのは苦手 |
||
| + | |Event Name D2 = 真冬のお祝い |
||
| + | |}} |
||
| + | |-| |
||
| + | Live= |
||
| + | {{EventLives |
||
| + | |Event = Brilliance★Knights' Starlight Festival |
||
| + | |color2 = #F8D57C |
||
| + | |}}<br> |
||
| + | {{LiveSummary}} |
||
|-| |
|-| |
||
Event Point Bonus= |
Event Point Bonus= |
||
| − | {| cellspacing="1" cellpadding="2" border="1" align="center" width="100%" class="article-table" style="line-height:10px" |
+ | {| cellspacing="1" cellpadding="2" border="1" align="center" width="100%" class="article-table" style="line-height:10px;font-size:small;" |
|- |
|- |
||
| + | ! |
||
| − | ! scope="col" style="padding:12px;"| |
||
! scope="col" style="padding:12px;"|Reward |
! scope="col" style="padding:12px;"|Reward |
||
! scope="col" style="padding:12px;"|Event Points Required |
! scope="col" style="padding:12px;"|Event Points Required |
||
|- |
|- |
||
| − | |[[File:Story_mini.png|68px|center]] |
+ | |[[File:Story_mini.png|68px|center|link=]] |
|Story: |
|Story: |
||
|50 |
|50 |
||
|- |
|- |
||
| − | |[[File:Producer_Point_mini.png|center]] |
+ | |[[File:Producer_Point_mini.png|center|link=]] |
|200 Producer Points |
|200 Producer Points |
||
|110 |
|110 |
||
|- |
|- |
||
| − | |[[File:Diamond_mini.png|center]] |
+ | |[[File:Diamond_mini.png|center|link=]] |
|5 Diamonds |
|5 Diamonds |
||
|220 |
|220 |
||
|- |
|- |
||
| − | |[[File:Konpeitou.png|68px|center]] |
+ | |[[File:Konpeitou.png|68px|center|link=]] |
|3 Konpeito |
|3 Konpeito |
||
|330 |
|330 |
||
|- |
|- |
||
| − | |[[File:Producer_Point_mini.png|center]] |
+ | |[[File:Producer_Point_mini.png|center|link=]] |
|200 Producer Points |
|200 Producer Points |
||
|440 |
|440 |
||
|- |
|- |
||
| − | |[[File:Story_mini.png|68px|center]] |
+ | |[[File:Story_mini.png|68px|center|link=]] |
|Story: |
|Story: |
||
|550 |
|550 |
||
|- |
|- |
||
| − | |[[File:Yakisobapan.png|68px|center]] |
+ | |[[File:Yakisobapan.png|68px|center|link=]] |
|1 Yakisoba Bread |
|1 Yakisoba Bread |
||
|660 |
|660 |
||
|- |
|- |
||
| − | |[[File:Diamond_mini.png|center]] |
+ | |[[File:Diamond_mini.png|center|link=]] |
|5 Diamonds |
|5 Diamonds |
||
|770 |
|770 |
||
| Line 263: | Line 121: | ||
|880 |
|880 |
||
|- |
|- |
||
| − | |[[File:Konpeitou.png|68px|center]] |
+ | |[[File:Konpeitou.png|68px|center|link=]] |
|3 Konpeito |
|3 Konpeito |
||
|990 |
|990 |
||
|- |
|- |
||
| − | |[[File:Story_mini.png|68px|center]] |
+ | |[[File:Story_mini.png|68px|center|link=]] |
|Story: |
|Story: |
||
|1,100 |
|1,100 |
||
| Line 275: | Line 133: | ||
|1,700 |
|1,700 |
||
|- |
|- |
||
| − | |[[File:Producer_Point_mini.png|center]] |
+ | |[[File:Producer_Point_mini.png|center|link=]] |
|500 Producer Points |
|500 Producer Points |
||
|2,200 |
|2,200 |
||
|- |
|- |
||
| − | |[[File:Diamond_mini.png|center]] |
+ | |[[File:Diamond_mini.png|center|link=]] |
|5 Diamonds |
|5 Diamonds |
||
|2,800 |
|2,800 |
||
|- |
|- |
||
| − | |[[File:Story_mini.png|68px|center]] |
+ | |[[File:Story_mini.png|68px|center|link=]] |
|Story: |
|Story: |
||
|3,300 |
|3,300 |
||
|- |
|- |
||
| − | |[[File:Yakisobapan.png|68px|center]] |
+ | |[[File:Yakisobapan.png|68px|center|link=]] |
|1 Yakisoba Bread |
|1 Yakisoba Bread |
||
|3,900 |
|3,900 |
||
|- |
|- |
||
| − | |[[File:Producer_Point_mini.png|center]] |
+ | |[[File:Producer_Point_mini.png|center|link=]] |
|500 Producer Points |
|500 Producer Points |
||
|4,400 |
|4,400 |
||
|- |
|- |
||
| − | |[[File:Diamond_mini.png|center]] |
+ | |[[File:Diamond_mini.png|center|link=]] |
|5 Diamonds |
|5 Diamonds |
||
|5,000 |
|5,000 |
||
|- |
|- |
||
| − | |[[File:Story_mini.png|68px|center]] |
+ | |[[File:Story_mini.png|68px|center|link=]] |
|Story: |
|Story: |
||
|5,500 |
|5,500 |
||
| Line 307: | Line 165: | ||
|6,600 |
|6,600 |
||
|- |
|- |
||
| − | |[[File:Sweat star sports drink.png|68px|center]] |
+ | |[[File:Sweat star sports drink.png|68px|center|link=]] |
|1 Sports Drink |
|1 Sports Drink |
||
|7,700 |
|7,700 |
||
|- |
|- |
||
| − | |[[File:Story_mini.png|68px|center]] |
+ | |[[File:Story_mini.png|68px|center|link=]] |
|Story: |
|Story: |
||
|8,800 |
|8,800 |
||
|- |
|- |
||
| − | |[[File:Diamond_mini.png|center]] |
+ | |[[File:Diamond_mini.png|center|link=]] |
|5 Diamonds |
|5 Diamonds |
||
|9,900 |
|9,900 |
||
| Line 323: | Line 181: | ||
|11,000 |
|11,000 |
||
|- |
|- |
||
| − | |[[File:Story_mini.png|68px|center]] |
+ | |[[File:Story_mini.png|68px|center|link=]] |
|Story: |
|Story: |
||
|12,000 |
|12,000 |
||
|- |
|- |
||
| − | |[[File:Producer_Point_mini.png|center]] |
+ | |[[File:Producer_Point_mini.png|center|link=]] |
|1,000 Producer Points |
|1,000 Producer Points |
||
|13,000 |
|13,000 |
||
|- |
|- |
||
| − | |[[File:Story_mini.png|68px|center]] |
+ | |[[File:Story_mini.png|68px|center|link=]] |
|Story: |
|Story: |
||
|14,000 |
|14,000 |
||
|- |
|- |
||
| − | |[[File:Yakisobapan.png|68px|center]] |
+ | |[[File:Yakisobapan.png|68px|center|link=]] |
|1 Yakisoba Bread |
|1 Yakisoba Bread |
||
|15,000 |
|15,000 |
||
|- |
|- |
||
| − | |[[File:Story_mini.png|68px|center]] |
+ | |[[File:Story_mini.png|68px|center|link=]] |
|Story: |
|Story: |
||
|17,000 |
|17,000 |
||
|- |
|- |
||
| − | |[[File:Producer_Point_mini.png|center]] |
+ | |[[File:Producer_Point_mini.png|center|link=]] |
|1,000 Producer Points |
|1,000 Producer Points |
||
|18,000 |
|18,000 |
||
|- |
|- |
||
| − | |[[File:Sweat star sports drink.png|68px|center]] |
+ | |[[File:Sweat star sports drink.png|68px|center|link=]] |
|1 Sports Drink |
|1 Sports Drink |
||
|20,000 |
|20,000 |
||
|- |
|- |
||
| − | |[[File:Story_mini.png|68px|center]] |
+ | |[[File:Story_mini.png|68px|center|link=]] |
|Story: |
|Story: |
||
|21,000 |
|21,000 |
||
|- |
|- |
||
| − | |[[File:Yakisobapan.png|68px|center]] |
+ | |[[File:Yakisobapan.png|68px|center|link=]] |
|1 Yakisoba Bread |
|1 Yakisoba Bread |
||
|22,000 |
|22,000 |
||
|- |
|- |
||
| − | |[[File:Story_mini.png|68px|center]] |
+ | |[[File:Story_mini.png|68px|center|link=]] |
|Story: |
|Story: |
||
|28,000 |
|28,000 |
||
|- |
|- |
||
| − | |[[File:Story_mini.png|68px|center]] |
+ | |[[File:Story_mini.png|68px|center|link=]] |
|Story: |
|Story: |
||
|33,000 |
|33,000 |
||
|- |
|- |
||
| − | |[[File:Story_mini.png|68px|center]] |
+ | |[[File:Story_mini.png|68px|center|link=]] |
|Story: |
|Story: |
||
|39,000 |
|39,000 |
||
|- |
|- |
||
| − | |[[File:Story_mini.png|68px|center]] |
+ | |[[File:Story_mini.png|68px|center|link=]] |
|Story: |
|Story: |
||
|44,000 |
|44,000 |
||
|- |
|- |
||
| − | |[[File:Story_mini.png|68px|center]] |
+ | |[[File:Story_mini.png|68px|center|link=]] |
|Story: |
|Story: |
||
|50,000 |
|50,000 |
||
|- |
|- |
||
| − | |[[File:Story_mini.png|68px|center]] |
+ | |[[File:Story_mini.png|68px|center|link=]] |
|Story: |
|Story: |
||
|55,000 |
|55,000 |
||
|- |
|- |
||
| − | |[[File:Red Square Gem.png|center]] |
+ | |[[File:Red Square Gem.png|center|link=]] |
|5 Medium Red Gems |
|5 Medium Red Gems |
||
|66,000 |
|66,000 |
||
| Line 391: | Line 249: | ||
|77,000 |
|77,000 |
||
|- |
|- |
||
| − | |[[File:Blue Square Gem.png|center]] |
+ | |[[File:Blue Square Gem.png|center|link=]] |
|5 Medium Blue Gems |
|5 Medium Blue Gems |
||
|88,000 |
|88,000 |
||
| Line 399: | Line 257: | ||
|99,000 |
|99,000 |
||
|- |
|- |
||
| − | |[[File:Yellow Square Gem.png|center]] |
+ | |[[File:Yellow Square Gem.png|center|link=]] |
|5 Medium Yellow Gems |
|5 Medium Yellow Gems |
||
|110,000 |
|110,000 |
||
| Line 407: | Line 265: | ||
|130,000 |
|130,000 |
||
|- |
|- |
||
| − | |[[File:Background mini.png|68px|center]] |
+ | |[[File:Background mini.png|68px|center|link=]] |
|Background: StarFes Stage (First Half) |
|Background: StarFes Stage (First Half) |
||
|170,000 |
|170,000 |
||
| Line 415: | Line 273: | ||
|200,000 |
|200,000 |
||
|- |
|- |
||
| − | |[[File:Background mini.png|68px|center]] |
+ | |[[File:Background mini.png|68px|center|link=]] |
|Background: StarFes Stage (Second Half Knights) |
|Background: StarFes Stage (Second Half Knights) |
||
|220,00 |
|220,00 |
||
|- |
|- |
||
| − | |[[File:Sweat star sports drink.png|68px|center]] |
+ | |[[File:Sweat star sports drink.png|68px|center|link=]] |
|1 Sports Drink |
|1 Sports Drink |
||
|240,000 |
|240,000 |
||
| Line 427: | Line 285: | ||
|280,000 |
|280,000 |
||
|- |
|- |
||
| − | |[[File:Red Square Gem.png|center]] |
+ | |[[File:Red Square Gem.png|center|link=]] |
|5 Medium Red Gems |
|5 Medium Red Gems |
||
|300,000 |
|300,000 |
||
| Line 435: | Line 293: | ||
|330,000 |
|330,000 |
||
|- |
|- |
||
| − | |[[File:Blue Square Gem.png|center]] |
+ | |[[File:Blue Square Gem.png|center|link=]] |
|5 Medium Blue Gems |
|5 Medium Blue Gems |
||
|350,000 |
|350,000 |
||
| Line 443: | Line 301: | ||
|390,000 |
|390,000 |
||
|- |
|- |
||
| − | |[[File:Yellow Square Gem.png|center]] |
+ | |[[File:Yellow Square Gem.png|center|link=]] |
|5 Medium Yellow Gems |
|5 Medium Yellow Gems |
||
|410,000 |
|410,000 |
||
|- |
|- |
||
| − | |[[File:Diamond_mini.png|center]] |
+ | |[[File:Diamond_mini.png|center|link=]] |
|10 Diamonds |
|10 Diamonds |
||
|440,000 |
|440,000 |
||
| Line 455: | Line 313: | ||
|500,000 |
|500,000 |
||
|- |
|- |
||
| − | |[[File:Sweat star sports drink.png|68px|center]] |
+ | |[[File:Sweat star sports drink.png|68px|center|link=]] |
|1 Sports Drink |
|1 Sports Drink |
||
|550,000 |
|550,000 |
||
| Line 463: | Line 321: | ||
|660,000 |
|660,000 |
||
|- |
|- |
||
| − | |[[File:Yakisobapan.png|68px|center]] |
+ | |[[File:Yakisobapan.png|68px|center|link=]] |
|1 Yakisoba Bread |
|1 Yakisoba Bread |
||
|770,000 |
|770,000 |
||
| Line 471: | Line 329: | ||
|880,000 |
|880,000 |
||
|- |
|- |
||
| − | |[[File:Sweat star sports drink.png|68px|center]] |
+ | |[[File:Sweat star sports drink.png|68px|center|link=]] |
|1 Sports Drink |
|1 Sports Drink |
||
|990,000 |
|990,000 |
||
| Line 491: | Line 349: | ||
|1,400,000 |
|1,400,000 |
||
|- |
|- |
||
| − | |[[File:Red Star Gem.png|center]] |
+ | |[[File:Red Star Gem.png|center|link=]] |
|3 Large Red Gems |
|3 Large Red Gems |
||
|1,500,000 |
|1,500,000 |
||
|- |
|- |
||
| − | |[[File:Sweat star sports drink.png|68px|center]] |
+ | |[[File:Sweat star sports drink.png|68px|center|link=]] |
|1 Sports Drink |
|1 Sports Drink |
||
|1,600,000 |
|1,600,000 |
||
|- |
|- |
||
| − | |[[File:Yakisobapan.png|68px|center]] |
+ | |[[File:Yakisobapan.png|68px|center|link=]] |
|1 Yakisoba Bread |
|1 Yakisoba Bread |
||
|1,700,000 |
|1,700,000 |
||
|- |
|- |
||
| − | |[[File:Blue Star Gem.png|center]] |
+ | |[[File:Blue Star Gem.png|center|link=]] |
|3 Large Blue Gems |
|3 Large Blue Gems |
||
|1,800,000 |
|1,800,000 |
||
|- |
|- |
||
| − | |[[File:(Aligned Stage) Tsukasa Suou mini.png|68px|center|link=]] |
+ | |[[File:(Aligned Stage) Tsukasa Suou mini.png|68px|center|link=]] |
|Card: [[(Aligned Stage) Tsukasa Suou]] |
|Card: [[(Aligned Stage) Tsukasa Suou]] |
||
|1,900,000 |
|1,900,000 |
||
|- |
|- |
||
| − | |[[File:Yellow Star Gem.png|center]] |
+ | |[[File:Yellow Star Gem.png|center|link=]] |
|3 Large Yellow Gems |
|3 Large Yellow Gems |
||
|2,000,000 |
|2,000,000 |
||
|- |
|- |
||
| − | |[[File:Sweat star sports drink.png|68px|center]] |
+ | |[[File:Sweat star sports drink.png|68px|center|link=]] |
|3 Sports Drink |
|3 Sports Drink |
||
|2,100,000 |
|2,100,000 |
||
| Line 525: | Line 383: | ||
|-| |
|-| |
||
Ranking= |
Ranking= |
||
| + | {{EventRankingv7 |
||
| − | {| cellspacing="1" cellpadding="2" border="1" align="center" width="100%" class="article-table" style="line-height:10px" |
||
| + | |Rank1 = (Holy Knight of Silver) Arashi Narukami |
||
| − | |- |
||
| + | |Rank2 = (Blessed Smile) Izumi Sena |
||
| − | ! scope="col" style="padding:12px;"|Rank |
||
| + | |Rank3 = (Vampire's Gift Exchange) Ritsu Sakuma |
||
| − | ! scope="col" style="padding:12px;"|Reward |
||
| − | | |
+ | |}} |
| − | |1-1,000 |
||
| − | |[[File:(Holy Knight of Silver) Arashi Narukami mini.png|68px|link=(Holy Knight of Silver) Arashi Narukami]] x5, [[File:(Blessed Smile) Izumi Sena mini.png|68px|link=(Blessed Smile) Izumi Sena]] x5, [[File:(Vampire's Gift Exchange) Ritsu Sakuma mini.png|68px|link=(Vampire's Gift Exchange) Ritsu Sakuma]] x5 |
||
| − | |- |
||
| − | |1,001-2,000 |
||
| − | |[[File:(Holy Knight of Silver) Arashi Narukami mini.png|68px|link=(Holy Knight of Silver) Arashi Narukami]] x4, [[File:(Blessed Smile) Izumi Sena mini.png|68px|link=(Blessed Smile) Izumi Sena]] x5, [[File:(Vampire's Gift Exchange) Ritsu Sakuma mini.png|68px|link=(Vampire's Gift Exchange) Ritsu Sakuma]] x5 |
||
| − | |- |
||
| − | |2,001-3,500 |
||
| − | |[[File:(Holy Knight of Silver) Arashi Narukami mini.png|68px|link=(Holy Knight of Silver) Arashi Narukami]] x3, [[File:(Blessed Smile) Izumi Sena mini.png|68px|link=(Blessed Smile) Izumi Sena]] x5, [[File:(Vampire's Gift Exchange) Ritsu Sakuma mini.png|68px|link=(Vampire's Gift Exchange) Ritsu Sakuma]] x5 |
||
| − | |- |
||
| − | |3,501-5,000 |
||
| − | |[[File:(Holy Knight of Silver) Arashi Narukami mini.png|68px|link=(Holy Knight of Silver) Arashi Narukami]] x3, [[File:(Blessed Smile) Izumi Sena mini.png|68px|link=(Blessed Smile) Izumi Sena]] x4, [[File:(Vampire's Gift Exchange) Ritsu Sakuma mini.png|68px|link=(Vampire's Gift Exchange) Ritsu Sakuma]] x5 |
||
| − | |- |
||
| − | |5,001-7,000 |
||
| − | |[[File:(Holy Knight of Silver) Arashi Narukami mini.png|68px|link=(Holy Knight of Silver) Arashi Narukami]] x2, [[File:(Blessed Smile) Izumi Sena mini.png|68px|link=(Blessed Smile) Izumi Sena]] x4, [[File:(Vampire's Gift Exchange) Ritsu Sakuma mini.png|68px|link=(Vampire's Gift Exchange) Ritsu Sakuma]] x5 |
||
| − | |- |
||
| − | |7,001-10,000 |
||
| − | |[[File:(Holy Knight of Silver) Arashi Narukami mini.png|68px|link=(Holy Knight of Silver) Arashi Narukami]] x1, [[File:(Blessed Smile) Izumi Sena mini.png|68px|link=(Blessed Smile) Izumi Sena]] x3, [[File:(Vampire's Gift Exchange) Ritsu Sakuma mini.png|68px|link=(Vampire's Gift Exchange) Ritsu Sakuma]] x5 |
||
| − | |- |
||
| − | |10,001-14,000 |
||
| − | |[[File:(Blessed Smile) Izumi Sena mini.png|68px|link=(Blessed Smile) Izumi Sena]] x3, [[File:(Vampire's Gift Exchange) Ritsu Sakuma mini.png|68px|link=(Vampire's Gift Exchange) Ritsu Sakuma]] x4 |
||
| − | |- |
||
| − | |14,001-18,000 |
||
| − | |[[File:(Blessed Smile) Izumi Sena mini.png|68px|link=(Blessed Smile) Izumi Sena]] x2, [[File:(Vampire's Gift Exchange) Ritsu Sakuma mini.png|68px|link=(Vampire's Gift Exchange) Ritsu Sakuma]] x4 |
||
| − | |- |
||
| − | |18,001-22,000 |
||
| − | |[[File:(Blessed Smile) Izumi Sena mini.png|68px|link=(Blessed Smile) Izumi Sena]] x2, [[File:(Vampire's Gift Exchange) Ritsu Sakuma mini.png|68px|link=(Vampire's Gift Exchange) Ritsu Sakuma]] x3 |
||
| − | |- |
||
| − | |22,001-26,000 |
||
| − | |[[File:(Blessed Smile) Izumi Sena mini.png|68px|link=(Blessed Smile) Izumi Sena]] x1, [[File:(Vampire's Gift Exchange) Ritsu Sakuma mini.png|68px|link=(Vampire's Gift Exchange) Ritsu Sakuma]] x3 |
||
| − | |- |
||
| − | |26,001-32,000 |
||
| − | |[[File:(Blessed Smile) Izumi Sena mini.png|68px|link=(Blessed Smile) Izumi Sena]] x1, [[File:(Vampire's Gift Exchange) Ritsu Sakuma mini.png|68px|link=(Vampire's Gift Exchange) Ritsu Sakuma]] x2 |
||
| − | |- |
||
| − | |32,001-50,000 |
||
| − | |[[File:(Vampire's Gift Exchange) Ritsu Sakuma mini.png|68px|link=(Vampire's Gift Exchange) Ritsu Sakuma]] x2, 5000 Producer Points |
||
| − | |- |
||
| − | |50,001-60,000 |
||
| − | |[[File:(Vampire's Gift Exchange) Ritsu Sakuma mini.png|68px|link=(Vampire's Gift Exchange) Ritsu Sakuma]] x2, 4000 Producer Points |
||
| − | |- |
||
| − | |60,001-70,000 |
||
| − | |[[File:(Vampire's Gift Exchange) Ritsu Sakuma mini.png|68px|link=(Vampire's Gift Exchange) Ritsu Sakuma]] x2, 3000 Producer Points |
||
| − | |- |
||
| − | |70,001-80,000 |
||
| − | |[[File:(Vampire's Gift Exchange) Ritsu Sakuma mini.png|68px|link=(Vampire's Gift Exchange) Ritsu Sakuma]] x2, 2500 Producer Points |
||
| − | |- |
||
| − | |80,001-90,000 |
||
| − | |[[File:(Vampire's Gift Exchange) Ritsu Sakuma mini.png|68px|link=(Vampire's Gift Exchange) Ritsu Sakuma]] x1, 2000 Producer Points |
||
| − | |- |
||
| − | |90,001-130,000 |
||
| − | |[[File:(Vampire's Gift Exchange) Ritsu Sakuma mini.png|68px|link=(Vampire's Gift Exchange) Ritsu Sakuma]] x1, 1500 Producer Points |
||
| − | |- |
||
| − | |130,001-200,000 |
||
| − | |[[File:(Vampire's Gift Exchange) Ritsu Sakuma mini.png|68px|link=(Vampire's Gift Exchange) Ritsu Sakuma]] x1, 1000 Producer Points |
||
| − | |- |
||
| − | |200,001-280,000 |
||
| − | |1000 Producer Points |
||
| − | |} |
||
|-| |
|-| |
||
Event Scouting= |
Event Scouting= |
||
| Line 592: | Line 393: | ||
|-| |
|-| |
||
Cards= |
Cards= |
||
| + | {{EventCard |
||
| − | {| cellspacing="1" cellpadding="2" border="0" align="center" width="675px" style="border:1px solid #C8B890;" |
||
| + | |color1 = #648EC6 |
||
| − | | style="text-align:center;background-color:#648EC6;color:#fff;padding:6px;font-size:17px;"|'''Ranking Reward''' |
||
| + | |color2 = #F8D57C |
||
| − | |- |
||
| + | |Rank1 = (Holy Knight of Silver) Arashi Narukami |
||
| − | | |
||
| + | |Rank2 = (Blessed Smile) Izumi Sena |
||
| − | <center><table width="620" cellspacing="1" cellpadding="2" border="0"><tr> |
||
| + | |Rank3 = (Vampire's Gift Exchange) Ritsu Sakuma |
||
| − | <td align="center">[[File:(Holy Knight of Silver) Arashi Narukami.png|220px|center|link=(Holy Knight of Silver) Arashi Narukami]]</td> |
||
| + | |Point1 = (Holy Knight of the Golden Lion) Leo Tsukinaga |
||
| − | <td align="center">[[File:(Blessed Smile) Izumi Sena.png|220px|center|link=(Blessed Smile) Izumi Sena]]</td> |
||
| + | |Point2 = (Aligned Stage) Tsukasa Suou |
||
| − | <td align="center">[[File:(Vampire's Gift Exchange) Ritsu Sakuma.png|220px|center|link=(Vampire's Gift Exchange) Ritsu Sakuma]]</td> |
||
| + | |Point3 = (Silently Thawing Snow) Shu Itsuki |
||
| − | </tr></table></center> |
||
| + | |Point4 = (Road to the Sovereign) Mika Kagehira |
||
| − | |} |
||
| + | |Point5 = (Nostalgic Wings) Nazuna Nito |
||
| − | |||
| + | |}} |
||
| − | |||
| − | {| cellspacing="1" cellpadding="2" border="0" align="center" width="675px" style="border:1px solid #C8B890;" |
||
| − | | style="text-align:center;background-color:#F8D57C;color:#fff;padding:6px;font-size:17px;"|'''Event Point Reward''' |
||
| − | |- |
||
| − | | |
||
| − | <center><table width="620" cellspacing="1" cellpadding="2" border="0"><tr> |
||
| − | <td align="center">[[File:(Holy Knight of the Golden Lion) Leo Tsukinaga.png|220px|center|link=(Holy Knight of the Golden Lion) Leo Tsukinaga]]</td> |
||
| − | <td align="center">[[File:(Aligned Stage) Tsukasa Suou.png|220px|center|link=(Aligned Stage) Tsukasa Suou]]</td> |
||
| − | <td align="center">[[File:(Silently Thawing Snow) Shu Itsuki.png|220px|center|link=(Silently Thawing Snow) Shu Itsuki]]</td> |
||
| − | </tr></table></center><center><table width="620" cellspacing="1" cellpadding="2" border="0"><tr> |
||
| − | <td align="center">[[File:(Road to the Sovereign) Mika Kagehira.png|220px|center|link=(Road to the Sovereign) Mika Kagehira]]</td> |
||
| − | <td align="center">[[File:(Nostalgic Wings) Nazuna Nito.png|220px|center|link=(Nostalgic Wings) Nazuna Nito]]</td> |
||
| − | </tr></table></center> |
||
| − | |} |
||
</tabber> |
</tabber> |
||
__NOCATEGORYGALLERY__ |
__NOCATEGORYGALLERY__ |
||
Revision as of 10:44, 6 December 2016
| Brilliance★Knights' Starlight Festival {{{EventJP}}} |
|---|
| Event Story: [[{{{Story}}}|{{{Story}}}]] |
| Start: 11/30/16 at 15:00 JST (15:00 JST) | End: 12/10/16 at 22:00 JST (22:00 JST)
Revival: Added |
 |
"A snowy December. Tsukasa and Leo find Arashi alone on the school grounds. As he seems to be lost in thought, Tsukasa is worried, but..." |
Event
| Lesson | |||
| Cost: 10 AP & 20 AP | Producer Points Gained: 100 & 200 | EXP Gained: 100 & 200 | |
 | |||
| Izumi Sena | Special Event | Rival 1 | Rival 2 |
 |
 |
 | |
| Total Stats: | 9,360 | 12,785 | |
| Missions: | |||
| Events: | |||
| Locations: |  | ||
| Rewards: | Completing 1 Mission: | ||
| Tsukasa Suou | Special Event | Rival 1 | Rival 2 |
 |
 |
 | |
| Total Stats: | 11,550 | 20,189 | |
| Missions: | |||
| Events: | |||
| Locations: |  | ||
| Rewards: | Completing 1 Mission: | ||
| Unavailable until 12/5 (15:00 JST) | |||
| Arashi Narukami | Special Event | Rival 1 | Rival 2 |
 |
 |
 | |
| Total Stats: | 16,980 | 29,161 | |
| Missions: | |||
| Events: | |||
| Locations: |  | ||
| Rewards: | Completing 1 Mission: | ||
| Leo Tsukinaga | Special Event | Rival 1 | Rival 2 |
 |
|
 | |
| Total Stats: | 19,440 | 37,011 | |
| Missions: | |||
| Events: | |||
| Locations: |  | ||
| Rewards: | Completing 1 Mission: | ||
| Normal Lives | |||
 |
{{{LiveTitleN1}}} "{{{TextN1}}}" | ||
| Unsuccessful | "{{{UnsuccessN1}}}" | ||
| Success | "{{{SuccessN1}}}" | ||
 |
{{{LiveTitleN2}}} "{{{TextN2}}}" | ||
| Unsuccessful | "{{{UnsuccessN2}}}" | ||
| Success | "{{{SuccessN2}}}" | ||
 |
{{{LiveTitleN3}}} "{{{TextN3}}}" | ||
| Unsuccessful | "{{{UnsuccessN3}}}" | ||
| Success | "{{{SuccessN3}}}" | ||
| Rare Lives | |||
 |
{{{LiveTitleR1}}} "{{{TextR1}}}" | ||
| Unsuccessful | "{{{UnsuccessR1}}}" | ||
| Success | "{{{SuccessR1}}}" | ||
 |
{{{LiveTitleR2}}} "{{{TextR2}}}" | ||
| Unsuccessful | "{{{UnsuccessR2}}}" | ||
| Success | "{{{SuccessR2}}}" | ||
 |
{{{LiveTitleR3}}} "{{{TextR3}}}" | ||
| Unsuccessful | "{{{UnsuccessR3}}}" | ||
| Success | "{{{SuccessR3}}}" | ||
| Emergency Lives | |||
 |
{{{LiveTitleE1}}} "{{{TextE1}}}" | ||
| Unsuccessful | "{{{UnsuccessE1}}}" | ||
| Success | "{{{SuccessE1}}}" | ||
| Brief Live Summary |
|
| Brief Encore Summary | ||||
After finishing a live (normal, rare or emergency), there is a chance an encore will appear. If an encore has not appeared within 5 lives, the next one will be guaranteed.
|
| Reward | Event Points Required | |
|---|---|---|
 |
Story: | 50 |
 |
200 Producer Points | 110 |
| 5 Diamonds | 220 | |
 |
3 Konpeito | 330 |
|
200 Producer Points | 440 |
|
Story: | 550 |
 |
1 Yakisoba Bread | 660 |
| 5 Diamonds | 770 | |
| Card: (Silently Thawing Snow) Shu Itsuki | 880 | |
|
3 Konpeito | 990 |
|
Story: | 1,100 |
| Card: (Road to the Sovereign) Mika Kagehira | 1,700 | |
|
500 Producer Points | 2,200 |
| 5 Diamonds | 2,800 | |
|
Story: | 3,300 |
|
1 Yakisoba Bread | 3,900 |
|
500 Producer Points | 4,400 |
| 5 Diamonds | 5,000 | |
|
Story: | 5,500 |
| Card: (Nostalgic Wings) Nazuna Nito | 6,600 | |
 |
1 Sports Drink | 7,700 |
|
Story: | 8,800 |
| 5 Diamonds | 9,900 | |
| Card: (Silently Thawing Snow) Shu Itsuki | 11,000 | |
|
Story: | 12,000 |
|
1,000 Producer Points | 13,000 |
|
Story: | 14,000 |
|
1 Yakisoba Bread | 15,000 |
|
Story: | 17,000 |
|
1,000 Producer Points | 18,000 |
|
1 Sports Drink | 20,000 |
|
Story: | 21,000 |
|
1 Yakisoba Bread | 22,000 |
|
Story: | 28,000 |
|
Story: | 33,000 |
|
Story: | 39,000 |
|
Story: | 44,000 |
|
Story: | 50,000 |
|
Story: | 55,000 |
 |
5 Medium Red Gems | 66,000 |
| Card: (Road to the Sovereign) Mika Kagehira | 77,000 | |
 |
5 Medium Blue Gems | 88,000 |
| Card: (Nostalgic Wings) Nazuna Nito | 99,000 | |
 |
5 Medium Yellow Gems | 110,000 |
| Card: (Silently Thawing Snow) Shu Itsuki | 130,000 | |
 |
Background: StarFes Stage (First Half) | 170,000 |
| Card: (Road to the Sovereign) Mika Kagehira | 200,000 | |
|
Background: StarFes Stage (Second Half Knights) | 220,00 |
|
1 Sports Drink | 240,000 |
| Card: (Nostalgic Wings) Nazuna Nito | 280,000 | |
|
5 Medium Red Gems | 300,000 |
| Card: (Silently Thawing Snow) Shu Itsuki | 330,000 | |
|
5 Medium Blue Gems | 350,000 |
| Card: (Road to the Sovereign) Mika Kagehira | 390,000 | |
|
5 Medium Yellow Gems | 410,000 |
| 10 Diamonds | 440,000 | |
| Card: (Nostalgic Wings) Nazuna Nito | 500,000 | |
|
1 Sports Drink | 550,000 |
| Card: (Aligned Stage) Tsukasa Suou | 660,000 | |
|
1 Yakisoba Bread | 770,000 |
| Card: (Silently Thawing Snow) Shu Itsuki | 880,000 | |
|
1 Sports Drink | 990,000 |
| Card: (Holy Knight of the Golden Lion) Leo Tsukinaga | 1,100,000 | |
| Card: (Road to the Sovereign) Mika Kagehira | 1,200,000 | |
| Card: (Aligned Stage) Tsukasa Suou | 1,300,000 | |
| Card: (Nostalgic Wings) Nazuna Nito | 1,400,000 | |
 |
3 Large Red Gems | 1,500,000 |
|
1 Sports Drink | 1,600,000 |
|
1 Yakisoba Bread | 1,700,000 |
 |
3 Large Blue Gems | 1,800,000 |
| Card: (Aligned Stage) Tsukasa Suou | 1,900,000 | |
 |
3 Large Yellow Gems | 2,000,000 |
|
3 Sports Drink | 2,100,000 |
| Card: (Holy Knight of the Golden Lion) Leo Tsukinaga | 2,200,000 |
| Rank | Reward |
|---|---|
| 1 - 1,000 |  x5, x5,  x5, x5,  x5 x5
|
| 1,001 - 2,000 | x4, x5, x5
|
| 2,001 - 3,500 | x3, x5, x5
|
| 3,501 - 5,000 | x3, x4, x5
|
| 5,001 - 7,000 | x2, x4, x5
|
| 7,001 - 10,000 | x1, x3, x5
|
| 10,001 - 14,000 | x3, x4
|
| 14,001 - 18,000 | x2, x4
|
| 18,001 - 22,000 | x2, x3
|
| 22,001 - 26,000 | x1, x3
|
| 26,001 - 32,000 | x1, x2
|
| 32,001 - 50,000 | x2,  ×5000 Producer Points ×5000 Producer Points
|
| 50,001 - 60,000 | x2, ×4000 Producer Points
|
| 60,001 - 70,000 | x2, ×3000 Producer Points
|
| 70,001 - 80,000 | x2, ×2500 Producer Points
|
| 80,001 - 90,000 | x1, ×2000 Producer Points
|
| 90,001 - 130,000 | x1, ×1500 Producer Points
|
| 130,001 - 200,000 | x1, ×1000 Producer Points
|
| 200,001 - 280,000 | ×1000 Producer Points
|
| Scout! Philosopher's Guidance | |
|---|---|
|

 |
 |
 |
 |
| Ranking Reward | |||
|


| Event Point Reward | |||||
|


_Shu_Itsuki_mini.png)
_Mika_Kagehira_mini.png)
_Nazuna_Nito_mini.png)
_Tsukasa_Suou_mini.png)
_Leo_Tsukinaga_mini.png)
_Nazuna_Nito.png)
| Associated Event Scout |
{{{{{Scout}}} Scouting}} |